Mother of Two!

Mother of two!  That’s my new role in life.  Wow!  It is hard to believe that my son is already a month old!  It feels like it has gone by so quickly in some ways, but also like he was just born yesterday.

Life has been a bit hectic over the last month, as I’m sure anyone with a toddler and newborn can relate.  It is lots of fun having a newborn again.  So sweet.  So small.  So cozy.  It has also been hard having a newborn again.  Little sleep.  Lots of feeds.  Sore body.

In an earlier post I shared my daughter’s birth story.  Here is my son’s.

Throughout the pregnancy I was pretty nervous about the delivery.  I had needed a c-section with my daughter and had suffered from major panic attacks, bad enough that they needed to put me under to keep me from shaking so they could get her out.  I had a couple small panic attacks when I was pregnant with my son, which only fueled my worries about his delivery.  My goal was to be conscious for his birth.

My doctor and I discussed how I wanted to deliver my son, and we both agreed that a repeat c-section was probably a good option.  As the time got closer, I was able to meet with the doctor who had delivered my daughter and was able to schedule a date for her to perform the second operation.  I was very happy to have her again.

Very different having a planned c-section compared to an emergency one.  Things were much calmer, but still nerve wracking.  I was scheduled for Tues, Feb 24 at 1:00 pm.  My husband and I arrived at the hospital around 11:30 that morning.  I was given a gown to change into and settled onto a bed to wait until they were ready for me.  As expected, things weren’t exactly running on schedule so we waited for quite awhile.  Eventually the nurse came for me and we walked down the hallway to the room just outside the OR.  There I met with the anesthesiologist who walked me through the meds I would be getting.  (I have to say that when I booked the c-section, I really wanted the same doctor; if we have another kid, I want to book with the same anesthesiologist!  He was fantastic, letting me know what was going to happen and helping me stay calmer than I otherwise might have been.)

A nurse led me into the OR.  That room is a very bright room!  A lot smaller than I realized.  I was helped onto the table and given, first a mild sedative (because of my panic attack history) and then a spinal.  Unlike an epidural which feels like ice being poured down your back, the spinal started with heat in my toes.  An interesting sensation.  Before it completely kicked in and I couldn’t move anymore, I laid down on the operating table and the screen was put up and they finished getting ready to start the operation.  Once I was ready, my husband was permitted into the room.

I remember a bit of pressure being put on my belly.  I’m convinced I could feel being cut open – no pain, just that something was happening.  I was crying for most of the operation, with the anesthesiologist and my husband offering reassuring words of comfort.  I wasn’t aware of the reason until afterwards, but eventually the anesthesiologist told me that he was going to put me under for just a few minutes.
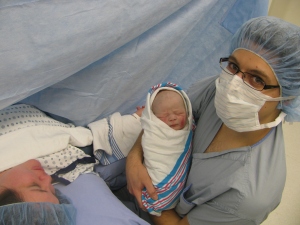
IMG_0490When I came to, there was my husband, holding our son!  (So much for being conscious for the delivery!  Oh well!)  I had been out for no longer than about five minutes.  Enough time for the doctor to use forceps and extra force to pull the baby out!  (I didn’t even know that they might need to use forceps with a c-section.)  After I was conscious again, they quickly finished up the operation, and I was moved to the recovery room.

In the recovery room, I got a chance to actually hold my son.  At 8 pounds 10 ounces, he was a lot bigger than I had thought he would be.  Of course, as a newborn, he was still so tiny!  He had an angry red mark on his cheek and bruises on his ears from the forceps, but I was told that they would disappear within the next day or two.  I think the red mark on his cheek was gone by that evening!  Magic baby skin as my sister says.
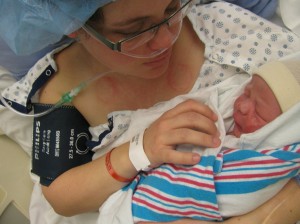
IMG_0498After about an hour in the recovery room, making sure things were going how they should, I was moved into a private room on the postpartum unit.  My parents, one of my sisters, my husband’s parents, and his sister were there to meet our little boy and shortly after, my other sister arrived, bringing our daughter.  I got a little teary eyed when I saw my grown up little 21 month old!  My mom shooed everyone out, but thankfully, my one sister pushed my other sister back into the room to take some pictures of our new little family.

We have now been a family of four for over a month.  Our daughter, E, loves her new baby brother, C, showering him with kisses and hugs.  Whenever we put him on a play mat, she immediately leaves whatever she is doing to cuddle with him.  I’m still adjusting to being a mother of two, trying to balance my time between both my children, my husband, while still getting some “me” time.

I am totally in love with my new baby boy and am looking forward to the joys and challenges of having a son.

 

Four Months!

UltrasoundWow!   How did four months of pregnancy happen?  It feels like I just found out that I was pregnant and here I am, almost half way through!

(Note: For those of you following my Disney Princess Inspired Quiet Book tutorials, more will be coming!  I promise!  I hope to get to them soon!)

Now back to the pregnancy update.  🙂

How far along: 17 weeks and 1 day (Due Date is March 1st)

Total weight gain: Still haven’t gained anything yet.

Maternity clothes: Yup.  I’ve been wearing maternity pants and skirts for a while now and have recently switched to maternity tops.  They just fit my changing body better, even though I’m not that big yet.

Stretch marks: No

Sleep: Yes and no.  Some days I feel rested (or at least less tired) while other days I’m completely exhausted!  I’ve been able to sleep in a bit when my husband gets up with E and takes her out of the house so I don’t hear every little noise she makes.

Best moment of this week: Getting to see my baby at the ultrasound (even though it was after the doctor couldn’t find the baby’s heartbeat the day before).  I go for my next ultrasound on October 2.

Miss anything: Still missing food that tastes good.

Movement: The little one is moving like crazy!  I thought I was feeling him/her at the beginning of Sept, but now I definitely know that it is the baby I’m feeling. 

Food cravings: I wish!  I’d love to have something that I really wanted to eat, even if it wasn’t the healthiest.

Anything making you queasy or sick: Most things.  😦

Have you started to show yet: I think so!  I think I’m still in that awkward “is she pregnant or just carrying a few too many pounds around her middle” stage.  Haha!  I’ve started taking belly pictures, but there isn’t much to show yet.

Gender: Still trying to convince my husband that we should find out when the time comes.

Labor signs: N/A

Belly button in or out: In 

Wedding rings on or off: On

Happy or moody most of the time: Totally depends on the time of day.  I’m usually in a better mood in the mornings.

Until next time!  Enjoy the fall weather (hopefully the sun is shining where you are too!)

My Baby is Going to be a Big Sister!

Elsa Big Sister


I figure it’s time to make it officially known that I am pregnant with Baby #2!  Most of the time I’m too busy to remember, but then I find myself wondering why on earth am I so tired and/or grouchy and/or nauseated and then I remember that there is a tiny human being growing safely inside.

This is the picture that we used to announce to family and friends that our little E is going to be a big sister!  I wanted to do something fun, but wasn’t feeling super creative so I’m happy with how this picture turned out.  🙂

So in case anyone is interested, here are some extra details…(I don’t know who originally came up with this list, but I’ve seen it on a few blogs, and I figured I’d join in the fun)

How far along: 12 weeks and 1 day (Due Date is March 1st)

Total weight gain: I’ve actually lost at least 6 pounds since taking the pregnancy test due to nothing being appetizing these days!

Maternity clothes: Oh yes!  I started my new job right before I found out and since none of my regular pants were fitting properly anyways, I figured I might as well be comfortable and started wearing maternity pants.  I am still wearing regular tops though.

Stretch marks: No

Sleep: Seems like I’m constantly tired, more so than with my first pregnancy.  I figure it is because I have a toddler who rises at the crack of dawn (or almost).  I am using two body length pillows to help align my hips and hopefully help with my sciatica.  

Best moment of this week: Posting our announcement on Facebook and getting lots of excited responses.

Miss anything: Food that is appetizing and sits well in my stomach.

Movement: Too early still. 

Food cravings: I wish!  I’d love to have something that I really wanted to eat, even if it wasn’t the healthiest.  The closest thing to a “craving” would be breaded and fried zucchini…it seems to be the only thing that tastes good these days.  That and ice water.

Anything making you queasy or sick: Most things.  😦

Have you started to show yet: I’ve definitely gotten bigger around the middle, but I don’t think it would be obvious to those who don’t know me all that well. Which reminds me, I need to start taking belly pictures!

Gender: Still trying to convince my husband that we should find out when the time comes.

Labor signs: N/A

Belly button in or out: In 

Wedding rings on or off: On

Happy or moody most of the time: Pretty moody a lot of the time (Poor Husband!)

Well there you have it. 🙂  We are pretty excited about having another baby, although a lot of the time I just start wondering what are we thinking having another baby when sometimes it feels like we can barely keep up with E.  

Disney Princess Inspired Quiet Book: Tangled Satchel Page


IMG_4103

This page was inspired by a quiet book page I found through Pinterest.  I think it is a great addition to my Disney Princess Inspired Quiet Book.

NOTE: When I created the quiet book, I completed all the pages and then sewed them together.  That means that each of the pages has about 1/2 inch on three sides that will “disappear” when sewn to the next page.  The fourth side will be used for binding the book together.  You can see the finished book here.  The instructions for the binding will be in a future post.

THESE PATTERNS ARE FOR PERSONAL USE ONLY AND NOT FOR SALE.  YOU MAY NOT MAKE ITEMS FOR SALE OR PROFIT.  IF YOU WOULD LIKE TO MAKE THESE PAGES, PLEASE GIVE ME CREDIT BY LINKING TO MY PAGE.

Materials:

– felt (light purple, dark purple, dark brown, black, dark gray, gold, sparkly white)

– ribbon

– thread

– cardboard

– glue

– fabric paint or glitter glue (optional)

– Satchel Page Pattern

Instructions:

1. Trim the background light purple felt so it is 10 inches by 8 1/2 inches (this will be the standard size for all the pages in this quiet book).

IMG_34112. Cut out the pan felt pieces.  There should be two black pans and one dark gray circle.  Glue the circle on one of the pans as shown in the picture.


IMG_3423Turn the pan over and glue a 9 inch piece of ribbon to the back of the handle.


IMG_3425Cut out the cardboard piece using the same pattern, but then trim it so that it is slightly smaller than the felt.  Glue it to the back of the pan.


IMG_3428Glue the second black pan felt over top of the cardboard.  Let it dry completely.


IMG_34153. Cut out the sun scarf pieces.  There should be two dark purple rectangles and one gold sun.


IMG_3429Repeat the steps above to add the ribbon and cardboard to the sun scarf.


IMG_34144. Cut out the pieces for the crown.  There should be two gold pieces, two small jewels, and one large jewel.  Glue the pieces together as shown, repeating the steps above to add the cardboard and ribbon.  I just added cardboard to the gold section as the sparkly white jewels were cut from a stiffened piece of felt.

Optional: add some extra bling using a glitter glue or fabric paint.


IMG_34445. Cut out the satchel pieces.  Pin the large satchel piece to the page.  It should be closer to one side than the other as one side will be used for binding the book.  In the picture the pins on the bottom are marking where it will fold.  Pin the satchel contents in place as shown in the picture.


IMG_3445Fold the satchel closed and pin in place.  Sew around all four sides, close to the edge of the satchel.  Move the satchel contents when necessary.


Pin the satchel flap and sew in place on the top edge only.  Carefully stuff the contents into the pouch and the page is complete!  🙂

I hope you enjoyed this tutorial.  I’d love to hear how your page turned out!

The binding instructions will be coming in a future post!

Disney Princess Inspired Quiet Book: Cinderella Clock Page Pattern and Tutorial

This was one of the first pages that I completed for my Disney Princess Inspired Quiet Book.  I figured I’d start with something relatively simple to build up my confidence.  Haha!

NOTE: When I created the quiet book, I completed all the pages and then sewed them together.  That means that each of the pages has about 1/2 inch on three sides that will “disappear” when sewn to the next page.  The fourth side will be used for binding the book together.  You can see the finished book here.  The instructions for the binding will be in a future post.

THESE PATTERNS ARE FOR PERSONAL USE ONLY AND NOT FOR SALE.  YOU MAY NOT MAKE ITEMS FOR SALE OR PROFIT.  IF YOU WOULD LIKE TO SHARE THESE QUIET BOOK PAGES, PLEASE GIVE ME CREDIT BY LINKING TO MY PAGE.

Materials:

– felt (navy blue, light gray, dark gray, white)

– button

– fabric paint

– thread

– glue

– Clock Page Pattern

Instructions:

1. Trim the background navy blue felt so it is 10 inches by 8 1/2 inches (this will be the standard size for all the pages in this quiet book).

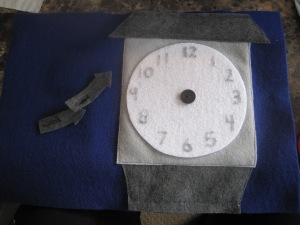
IMG_34062. Cut out the clock face.  Using fabric paint, write the numbers 1 through 12 as seen on a clock face.  (Note: you can also do this step later if you want to attach the clock center by sewing instead of gluing.)


IMG_34163. Sewing the clock bottom to the background page: Sew a line 3/8 of an inch on the bottom side of the shape and close to the edge for the other three sides as seen in the picture.  The piece should be closer to one side of the page as the other side will be used for the binding of the book.


IMG_34184. Sew on the clock back and then the clock top piece.


IMG_34205. Once the fabric paint is dry, glue the clock face to the clock back.  (If you decided to sew the clock face on instead of glue, sew it in place then use the fabric paint to write the numbers.)


IMG_34216. Prep the clock hands.  Each clock hand requires a button hole.  Check your sewing machine’s instruction manual for how to sew a button hole.  Since I’m not a pro at making button holes, I decided to make the hole first and then cut out the hands.  You can see from the picture that it took me a few tries to get it right!  Haha!


IMG_34387. Sew on the button in the center of the clock face and loop the clock arms over it.  And you’re done!

Deleted!!!

A couple days ago I figured it was time to post another tutorial for my Disney Princess Inspired Quiet Book.  I went to look at the pictures I had taken…and they weren’t there…neither were ANY of the pictures I had put on my computer!!!!  They were just GONE!!!

The entire folder had just been deleted.  I don’t know how.  It might have been through my daughter keyboard smashing.  Whatever the cause, I was instantly in shock.  Where were my pictures?  Would I be able to get them back?

The really upsetting part: all of the pictures we had taken of my daughter since she was born were on my computer!  We had backed up some of them onto an external hard drive – June 2013 to October 2013.  And everything from Easter is still on the cameras.  But November 2013 to April 2014 might be gone forever!

I could just cry! 😥

We have done a system recovery to try to get as much as we can back.  I am not touching my laptop until I know that we have recovered every possible photo and video.  So far we have found about 7 000 pictures.  I don’t know if about videos yet.  Now to go through them and see how much is actually there.

What I have learned…

  • BACK UP EVERYTHING!!!

Not too long ago my phone was smashed and I lost all the photos (good thing there weren’t many) on that phone.  I now have it set up to back any pictures up automatically.

We have an external hard drive that we have been backing up and then taking over to my parents’ house just to have it out of the house, but I think we are going to purchase a second one so that we can back stuff up a bit more often.  I’m thinking that any time I need to delete the pictures off my phone will be a good time to back up the pictures.

  • KEEP THINGS IN PERSPECTIVE

Before I knew that we could do a system recovery, and then while we were waiting the several hours for it to complete, I started thinking about my own baby pictures and how there aren’t tons, but it really doesn’t matter.  How often do I go back and look at them?  Not all that often, to be honest.  Yes, pictures are wonderful things to have, but they aren’t what make the memories.  Just think about our great great grandparents: they didn’t have access to today’s digital cameras, but they enjoyed life and made memories just the same.

I still really hope that we are able to recover all the photos and videos though!  I’ll keep you posted.

Has something like this ever happened to you?  Have you created a routine for backing up your pictures?  Any tips and tricks you’d care to share?


Disney Princess Inspired Quiet Book: Beauty and the Beast Castle Tutorial

IMG_4096

Tale as old as time…Song as old as rhyme…Beauty and the Beast.  I love this movie!  It’s a lovely story and I think that the Beauty and the Beast pages are the ones that I’m the most proud of so even though they aren’t the first pages in the completed book I’m sharing them first.  🙂

I hope you enjoy this tutorial.  Don’t forget to take a look at the complete Disney Princess Inspired Quiet Book!

NOTE: When I created the quiet book, I completed all the pages and then sewed them together.  That means that each of the pages has about 1/2 inch on three sides that will “disappear” when sewn to the next page.  The fourth side will be used for binding the book together.  You can see the finished book here.  The instructions for the binding will be in a future post.

THESE PATTERNS ARE FOR PERSONAL USE ONLY AND NOT FOR SALE.  YOU MAY NOT MAKE ITEMS FOR SALE OR PROFIT.  IF YOU WOULD LIKE TO SHARE THESE QUIET BOOK PAGES, PLEASE GIVE ME CREDIT BY LINKING TO MY PAGE.

Materials:

  • Felt (dark blue, dark gray, light gray, gold, red)
  • Zipper (about 4 inches)
  • Fabric Paint (I used brown and silver)
  • Fabric Glue
  • Cellophane
  • Castle Page Pattern

Instructions:

1. Trim the background dark blue felt so it is 10 inches by 8 1/2 inches (this will be the standard size for all the pages in this quiet book).

IMG_36022. Cut out the Ballroom and Rug pieces.  Sew them onto the background felt.  I sewed the ballroom only around the outside edges and then glued the inside “walls”, but they aren’t staying stuck so I’d recommend that you sew around the windows too.  I glued the rug in place, but again, would sew it in place if I were to make this page again.  Once they are sewn in place, use fabric paint to draw the corners of the walls and the pattern on the rug.  Let dry completely!  NOTE: I ACCIDENTALLY PUT EVERYTHING ON THE RIGHT SIDE OF THE PAGE INSTEAD OF THE LEFT SIDE OF THE PAGE!  THIS ONLY MAKES A DIFFERENCE IF YOU WANT THE CASTLE PAGE TO BE ON THE LEFT SIDE.

IMG_35973. Cut out the door pieces: two felt and one cellophane for each door.  The cellophane will need to be trimmed in order to fit properly.


IMG_3598

Sandwich the cellophane in between the two felt pieces and sew along the straight edges.

Repeat with the other door.


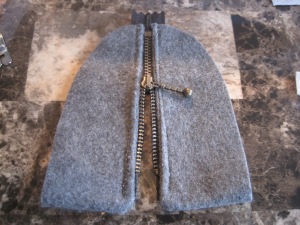
IMG_36004. Pin and sew the zipper to the long straight edges of the doors.


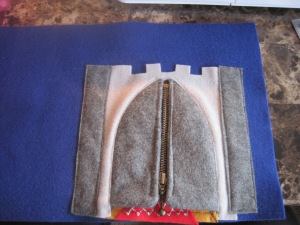
IMG_36035. Place the “closed” doors over the ballroom and pin in place.  Place the castle piece over the doors so that it is overlapping the curved edges of the doors.  Sew in place.  I sewed along the doors and then up the sides and on the bottom.  I glued the top in place, but it could easily be sew instead.  HINT: use lots of pins to hold everything in place.  And if it ends up a little crooked like mine did, remind yourself that it is for a child and she won’t mind too much.  🙂


IMG_36076. Sew the Towers to the sides of the castle.  They will overlap a little bit.  I sewed around all four edges.


IMG_36087. Glue or sew the roof pieces and window pieces in place.


8. To make the Beauty and the Beast character piece, I found a colouring page through a Google search and printed it out.  I then traced it onto Shrinky Dink plastic and coloured it.  It was a great excuse to buy that pack of permanent markers I was eyeing.  🙂  Following the Shrinky Dink instructions I sized the picture so that it would be the correct size once shrunk.  I punched three holes before shrinking it so that I could sew it in place.  I also painted a layer of clear top coat nail polish over it so that the colours wouldn’t scratch off.  (The trick with the nail polish is to let it drip on so that there is a thick layer instead of painting it on, otherwise the ink might smear.)  Sew in place and you are done!

The bottom of the page will be part of the seam allowance for completing the book so it will not show.  (Take a look at the finished page at the top of this post again).  I will be sharing the instructions for completing the book in a future post.  If you don’t want to complete the book as I did then simply trim that seam allowance part off.  I hope that makes sense!

I’d love to hear how your Castle page turns out!  Happy Crafting!


The Day I Became a Mom

It is hard to believe that my daughter is a year old today!  Was it really a year ago that I was waiting, and waiting, and waiting for her to arrive?  She was 10 days late.  My May baby ended up being a June baby instead.  I thought I’d share my birth story.

While I was pregnant I had read so many times that I should create a “birth plan” for my labour and delivery.  I think there is some value in having a plan, but when I say having a plan, I mean discussing the “what if” scenarios and maybe a couple extra things.  An example of the “what if” scenarios – what if the baby needs to be taken to the ICN, who will go with the baby, who will stay with mom?  You hope it won’t happen, but at least you know where everyone is going to be if it does.  Other things like do you want an epidural?  And who do you want in the delivery room?  Those are questions you might want to have answered too and put into your “birth plan”.

Here was my birth plan: I wanted to deliver in the hospital.  I wanted an epidural if possible.  I wanted my husband by my side, but if I needed my mom I gave myself permission to ask for her to come into the room.  I’m glad I didn’t have anything more complicated than that since it probably wouldn’t have happened.

Here’s what did happen:

IMG_0167

I was due May 24.  It came and went.  I was scheduled for an induction for June 3 at 8:00 AM.  I was sent in to the hospital for a non-stress test on June 2 just to make sure that the baby was doing ok.  This was the third non-stress test I had to do so I was starting to be a pro at them.  🙂  It went well and I was even asked by one of the intern doctors if they could bring in an ultrasound machine so that he could practice identifying the position of the baby for future deliveries he might be involved in.  They apparently needed someone very pregnant but not actually in labour.  I was the perfect candidate.  It was fun seeing the baby in there one last time.  We headed home shortly afterwards.

That evening I started getting contractions.  They weren’t all that painful, nothing more than menstrual cramps.  I’ve probably actually had worse cramps than the contractions I was having.  According to the information we were given I was supposed to head to the hospital if the contractions were coming in less than 5 minute intervals.  Once they reached 3 minutes on a consistent basis (around 11:00 at night) we decided to head to the hospital.  Another non-stress test, a pelvic exam, and I was sent home, being only 2 cm dilated.  😦

The contractions slowed down a bit, but they were enough to keep me from really sleeping that night.  They were also enough to dilate me just a little bit more.

Bright and early we drove to the hospital.  Another time being hooked up to the machines for a non-stress test.  My doctor visited me, confirmed that I was 3 cm dilated, and gave the go-ahead to start pumping me with oxytocin to induce labour.  Now we just had to wait for a labour and delivery room to open up.  In the meantime, the nurses came to start the IV.  Attempt one – not in.  Attempt two – not in.  Attempt three – it’s in, but it hurts!  It ended up hurting the entire day.  If I had known better I would have kept on mentioning it until it got fixed.

About an hour or so later I was moved into the labour and delivery room.  The wonderful thing about the hospital was that you were able to stay in one room the entire time.  The oxytocin was hooked up and we waited for things to start happening.  The contractions were still no more than menstrual cramp intensity.

Around noon my doctor stopped by and broke my water.  What a weird feeling!  It was quite uncomfortable when she used the crochet-like hook to break the membrane and then the warm liquid burst out.  It kind of felt like I had just wet myself!  About a half hour later that’s when things started happening!

The contractions started coming faster now and a bit more painful (although to be honest I don’t recall any pain since it was overshadowed by what was happening next).  I requested my epidural and then all of a sudden, out of the blue, I was in a full blown panic attack!!!  It was scary!  I had never had a panic attack like that before!!!  The nurse was fantastic.  She was with me the entire time, helping me get through the intense moments.  I was crying.  I was trying to breathe.  I was crushing my husband’s hand when I contraction would come.  I remember the nurse’s calming presence.  Her hand on my head.  Her gentle voice.  (Even now as I’m writing this I’m almost in tears from the memories!)  Eventually I calmed down enough and the anesthesiologist was able to give me the epidural.  It felt like ice being poured down my back and then no more pain.  Breathing returned to normal, crying stopped, and I was able to settle back down again.  (As a side note, I was reading somewhere the pros and cons of having an epidural.  One thing that was listed as a con was needing a catheter since you can’t really be up an and about.  I’m not sure why this was listed as a negative thing.  I loved not feeling like I had a full bladder.  Anyone who’s been pregnant knows the joys of having the baby sit on her bladder.  Haha!)

My parents came for a visit, as did my sisters.  It was fun being able to see them and it was a diversion while we were waiting for me to get more dilated.

At 6:00 pm my doctor came back to check on my progress.  (I had lots of visits from the nurses in between the doctor’s visits.)  It was determined that the baby was sunny side up and I was only about 7 cm dilated and the oxytocin was at a very high dose.  They decided to give it a bit more time, increasing the dose of oxytocin, and my doctor would come check again in a couple hours.

In those two hours my feet started swelling and my cervix did too so that by the time my doctor came back I had actually regressed.  Now I was only 6 cm dilated!  My doctor recommended a c-section.  They turned off the oxytocin drip.  I was told that there would be a bit of a wait before I would go into the OR because there was one lady in front of me in line.  Of course, about 10 minutes later the nurses popped into my room saying that they were waiting for blood work for her and so I was going in right away!  Anyone who knows me knows that I don’t do all that well with change…ok, I’m terrible with change…and being pumped up with oxytocin (a stress hormone) I was barely managing to keep calm.  My husband changed into scrubs (he looked pretty handsome in them if you ask me) and I was wheeled into the OR.

I lost it when they asked me to move from the bed I was in to the operating table.  I had been given an extra dose of the epidural and my feet were so swollen that I could barely move.  I started panicking again!!!  They tried to distract me and help me calm down, but I couldn’t stop shaking or crying.  My husband came into the OR and tried to help calm me down too….

The next thing I knew I was opening my eyes and there was my husband, holding our daughter!  They’d had to put me under in order to get me to stop shaking so they could perform the surgery.  I asked if the baby was a girl (apparently a few times) and I thanked the anesthesiologist for putting me under and then we moved to the recovery room…where I started having my third panic attack of the day!!!  My nose was stuffed and I was having a hard time breathing, the nurses were checking this and that, pushing on my uterus to make sure the bleeding had stopped…I don’t even remember how this panic attack ended, but I guess it did eventually and I was able to hold my daughter for the first time.

She was beautiful!  A tiny little perfect baby girl!  And she had a beautifully shaped head.  I was a mom!

After about an hour we were wheeled into a private room and my parents, my husband’s parents, and my sisters came into the room to meet the newest member of our family.  As I remember this part of the day I remember who was there and that there was time when I wasn’t holding my baby, but I cannot, for the life of me, remember anyone holding her.  I have pictures, but I guess I was still too drugged up to remember.  So strange.

The next morning we were told that the cord had been wrapped around my daughter’s neck a couple times.  It really made me appreciate how great it is to have hospitals, doctors, nurses, and epidurals.  There seems to be a huge fad for having “natural” births and home births, but there is a reason why there are hospitals and doctors.  The panic attacks I could have done without, but that was me and not the “modern medicine’s” fault.  My goal for the next time (if/when it comes around) is to be conscious when the baby is born, but at least I know that I’ll be well taken care of.

And now my baby is a year old!  Wow!  Happy 1st Birthday, Little E!

Disney Princess Inspired Quiet Book

I am SO excited with how my Disney Princess Inspired Quiet Book turned out!  It was a lot of work, but a lot of fun too!

I did a fair amount of searching for patterns on Pinterest, and I got a couple ideas for pages, but most of these pages are my own design (although not necessarily my own artwork).  🙂

I’ll be posting the patterns for most of these pages over the next few weeks so keep checking back.  In the meantime, here is a closer look at each of the pages.

The first page is “Cinderella”.  There is a magnet inside the dress and under the doll.  The idea is to dress Cinderella for the ball.

IMG_4080

Cinderella – “Dress” Cinderella (left); Clock (right)

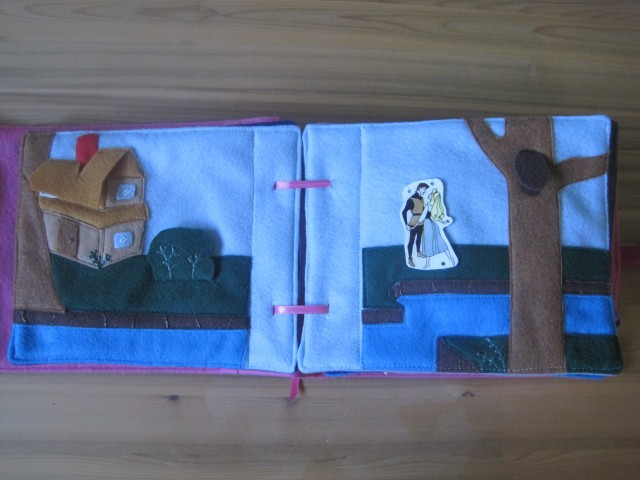
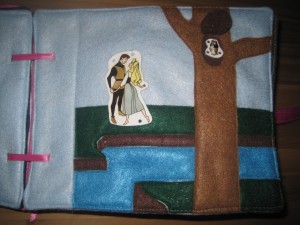
Second princess page is “Sleeping Beauty”.  This is my daughter’s favourite page at the moment.  It is a search and find page.  The characters are made from Shrinky Dink plastic.

IMG_4084

Sleeping Beauty Search and Find

IMG_4090IMG_4089

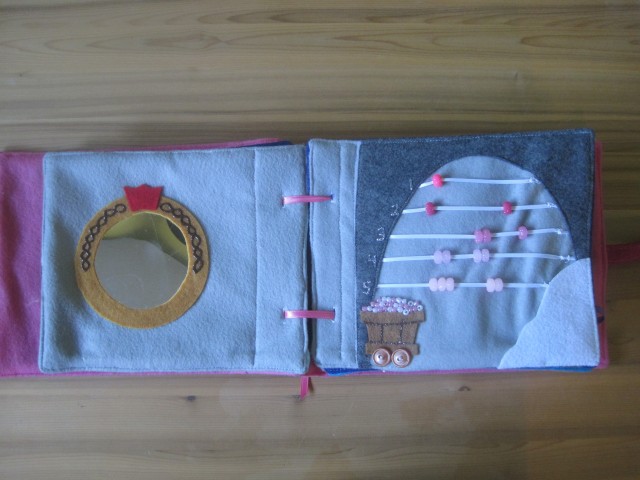
“Snow White” is next.  The Magic Mirror (made from a mirror I found from a used toy).  The right page is the Dwarves’ mine.

IMG_4091

Snow White – Mirror (left); Counting Mine (right)

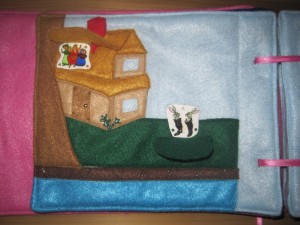
I’m very proud of the “Beauty and the Beast” pages.  The castle doors have cellophane in them to make them crinkle when touched.  Belle and the Beast are made from Shrinky Dink plastic.  The right page has the magic rose.  The petals “fall” off.

IMG_4095

Beauty and the Beast

IMG_4096IMG_4098

“The Little Mermaid”  These pages used many pictures I found on the internet printed and coloured on Shrinky Dink plastic.  On the left is a marble maze and on the right is an I Spy page.

IMG_4099

The Little Mermaid – Marble Maze (left); I Spy (right)

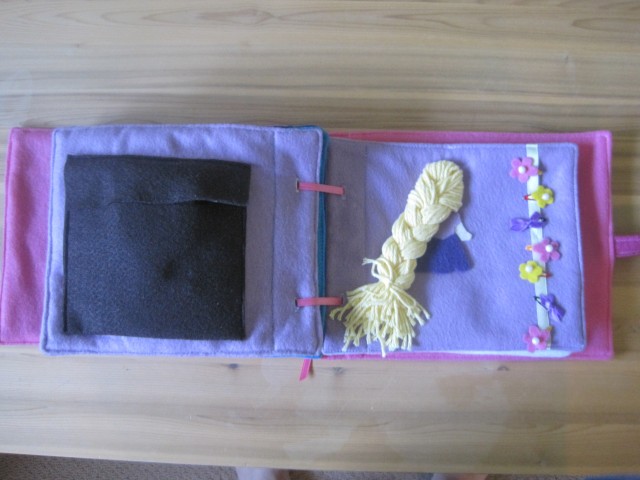
“Tangled” is next.  These two pages were inspired by ones I found on Pinterest.  I will be sharing the links to the pages in my tutorials along with my instructions for how I completed the pages.

IMG_4102

Tangled – Satchel (left); Hair (right) – These were inspired by pages I found through Pinterest. Links will be provided in the tutorials.

IMG_4103IMG_4104

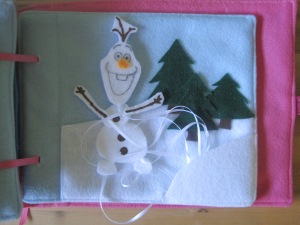
The final pages are “Frozen”.  Match the Snowflakes and Build a Snowman.  The Elsa doll is not my original creation so I can’t share that part, but I will share the pattern and instructions for the other parts.  Olaf was made using a pattern I found free online and I’ll include a link in that post as well.

IMG_4106

Frozen – Match the Snowflakes (left); Build a Snowman (right)

IMG_4107IMG_4109There you have it!  It was a lot of work, but I’m super happy with how it turned out and my daughter (who will be one on June 3rd) LOVES it!

Please note that some of these pages involved the use of pictures I found on the internet through Google searches.  I do not claim those pictures as my own.  Also, the Cinderella doll and Elsa doll were created based on someone else’s pattern so I can’t share those either.  However, I will be sharing the pattern pieces and assembly instructions for the rest of the pages!  🙂

I’ll also be sharing how to make the cover and put it all together.

Thanks for stopping by!  Happy Creating!

Hospital Bag Checklist

It’s been awhile since I’ve written a post.  The weather has turned beautiful so we have been enjoying being outside whenever we can!  🙂

With the arrival of summer, I know several people who are expecting their bundles of joy soon and that has made me start thinking about hospitals and delivery.  My daughter is turning one in a couple weeks so that might have something to do with it too.  I find myself thinking about how much has happened since little E came into our lives.

So with all this thought on hospitals, I figured my blog wouldn’t be complete without a “Hospital Bag Checklist” so here it goes!

What to take to the hospital.

The thing to remember is that every labour and delivery story is going to be different, and the length of your stay in the hospital may be different than someone else’s.  I had a c-section so I was in the hospital for 3 nights.  But I think that these things listed here would be nice to have regardless of how long you are in the hospital.  There are lots of lists on the internet to help you pack your bags, and here are my suggestions to add to it!  🙂

20130604_001034

FOR MOMMY:

  • hairbrush, hair ties, hair clip, bobby pins – After going through the entire crazy day, I was so grateful to be able to brush my hair and make myself look presentable again!  I looked a little worse for wear the night my daughter was delivered!
  • face wash, face lotion, make-up – I am one of those types of people who doesn’t feel completely like myself if I have a greasy face or without a bit of eye shadow on.  And I’m able to look back on the pictures feeling like I look at least somewhat decent.
  • shampoo and body wash – Some hospitals may provide this, but I took my own.  That first shower after delivery was fantastic!  I was able to wash off all the sweat and just felt so clean again!
  • toothbrush and toothpaste – A key part of feeling human again!
  • sleep nursing bra – I packed this and I’m glad I did since those silly hospital gowns really don’t provide all that much privacy when you are trying to breastfeed for the first time!
  • nursing pads – Just in case things start leaking a bit.
  • pajamas – I did bring a new set of pajamas that I had bought for the occasion, but I didn’t wear them.  I was so swollen from all the liquids they had pumped into me and the elastic on the pants hit my c-section incision rather uncomfortably.  I think next time I’m going to see if I can either find something that will be more comfortable after surgery or make one of those gowns that I’ve seen on Pinterest.
  • panties – Again, because of my c-section incision, I didn’t use the ones I had brought.  The hospital ones they provide are ridiculous looking, but they sure are comfy!  Next time I’m going to actually ask for a couple pairs to take home with me for the first week post delivery.  However, if I hadn’t had a c-section, I would have been more than happy to be back in my own normal panties again!
  • socks – Didn’t use them until I got dressed to go home, but I know that some women like to wear them during labour.
  • going home clothes – I took a super comfy pair of maternity sweat pants and a nursing top with me.
  • paper/pen – I had a small notebook that I used to record gifts that were brought when people came to visit.
  • camera and charger – Obviously. 🙂
  • cellphone and charger – I liked being able to share those first pictures and announce to the world that my daughter had arrived.  It was also nice to have to be able to stay in contact with my family and friends since I was in the hospital for a little longer than expected.
  • slippers/flip flops – I took slippers with me, but my feet were so swollen they didn’t really fit.  And I leaked blood on them (gross) when I got out of bed the first time.  I think next time I’ll take a pair of flip flops instead.
  • pads – I used the hospital ones during my stay, but they were rather thick so it was nice to have a thinner one to wear on my way home.
  • wallet – Not so much for the money or credit cards, but for the ID and Health Cards.

FOR BABY

  • going home outfit – I took two.  The ultrasound tech had told us we were having a girl, but on the off chance that she turned out to be a boy we took a girly sleeper and a gender neutral one.  The baby won’t need an outfit for in the hospital since s/he will probably just be wrapped up in a blanket most of the time or laying on your chest skin to skin.
  • hat – I forgot one, so the hospital provided one after E’s first bath.  It made a cute keepsake.
  • cloth diaper – This one is totally optional!  I’m pretty sure the hospital will give you a disposable diaper for your baby if need be, but I brought one of my cloth diapers since I was SO excited to use them.
  • car seat – At our hospital they did a safety check once E was strapped in, just to make sure she was in there properly.
  • blanket – Even though it was the beginning of June and beautiful weather, we still put a blanket over top of E so that she was nice and cozy.
  • soother/pacifier – Some people say not to introduce a soother too early, but I’m glad we brought them.  E was able to be soothed and I was able to get some sleep.
  • Vasoline – I brought some but used the tube the hospital provided instead.

FOR DADDY

  • pair of clothes – Just in case he got spit up on or something.
  • snacks or money for the vending machine – He might get hungry and the hospital doesn’t provide his meals.

Basically you’ll be taking what you would take for an overnight trip.

Hope you found this list helpful!  What’s in your hospital bag?