The Little Mermaid – one of the first movies I remember seeing in the movie theatre. Today I’ll be sharing the tutorial for making The Little Mermaid inspired pages.
Don’t forget to check out my completed Disney Princess Inspired Quiet Book!
NOTE: When I created the quiet book, I completed all the pages and then sewed them together. That means that each of the pages has about 1/2 inch on three sides that will “disappear” when sewn to the next page. The fourth side will be used for binding the book together. You can see the finished book here. The instructions for the binding will be in a future post.
THESE PATTERNS ARE FOR PERSONAL USE ONLY AND NOT FOR SALE. YOU MAY NOT MAKE ITEMS FOR SALE OR PROFIT. IF YOU WOULD LIKE TO SHARE THESE QUIET BOOK PAGES, PLEASE GIVE ME CREDIT BY LINKING TO MY PAGE.
Materials:
– felt (turquoise, purple, green)
– marble
– ribbon
– clear vinyl (rather than buying vinyl at the fabric store I used the packaging from an item I bought at the Dollar store)
– Shrinky Dink plastic
– permanent markers
– clear nail polish
– seed beads (at least that’s what I think they are called)
Instructions for Marble Maze page:
1. Trim the background turquoise felt so it is 10 inches by 8 1/2 inches (this will be the standard size for all the pages in this quiet book).
2. Cut a second turquoise felt so that it is 7 1/4 in by 7 in.
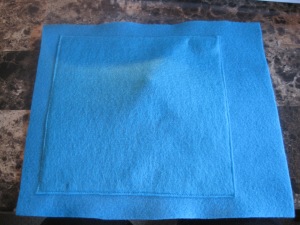 3. Sew the square on top of the background felt about 3/4 in from the left hand edge of the background felt. Once you have three of the sides sewn in place, put the marble underneath and sew the fourth edge in place.
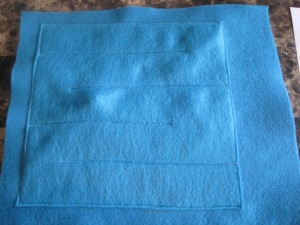 4. Moving the marble as needed, sew the maze lines as shown. Each section is about 3 1/2 in wide
5. Create your figures for added interest. I found some images through a Google search and printed them in the size I needed based on how much the Shrinky Dink plastic would shrink. Once I had the images sized, I traced them onto the Shrinky Dink plastic, coloured them with permanent markers, punched the holes for sewing, and heated them in the oven. Once they were out of the oven and cooled, I painted them with the clear nail polish. (I found that some colours, like red, tended to run even though they were permanent markers. To avoid that, let the nail polish drop onto the image instead of painting the polish. Hopefully that makes sense.)
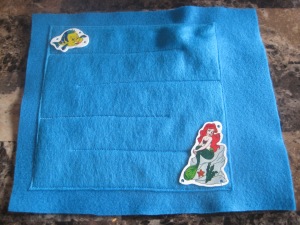 6. Once the polish is dry, sew the images in place and the pages is completed!
Instructions for I-Spy Page
 1. First create your images. You could either find stuff to put in or create them yourself. I decided that I wanted to do an “Under the Sea” theme and found images through a Google search. I think traced the images onto Shrinky Dink plastic. Once I had traced the image on one side, I flipped it over and went over the same lines, making the image double sided. I then coloured the images using permanent marker, trimmed the images, and put them in the oven. Once shrunk and cooled, I coated them with clear nail polish, letting the first side dry before repeating on the opposite side.
 2. Take a picture of the items. I printed the picture then bordered it with purple felt. This was just free hand so I don’t have a pattern for it. The back is solid purple; the front is vinyl bordered with purple felt.
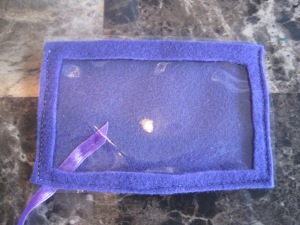 Sew the pieces together on three sides, remembering to put the ribbon in place.
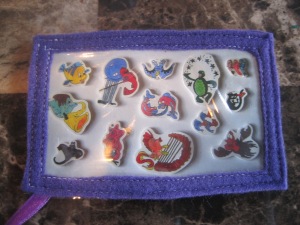 Insert the picture and sew up the fourth side.
3. Trim the background turquoise felt so it is 10 inches by 8 1/2 inches (this will be the standard size for all the pages in this quiet book).
4. Cut the purple felt so that it is 6 1/2 in by 7 in. Then cut out the centre so that the edge is 1/2 in thick on each side.
5. Cut the vinyl so that it is 6 in by 6 3/4 in.
 6. Pin (place the pins parallel to the edge of the vinyl instead of perpendicular so you only make holes in it where it would be sewn anyways) and sew the vinyl in place on three sides – 1 3/8 in from the right side of the background felt, 1 in from the bottom of the background felt, and 3 in from the left side of the background felt. It will be puffy in the middle since you will need room to put in the beads. Pour in the seed beads and images and sew the top in place 1 in from the top.
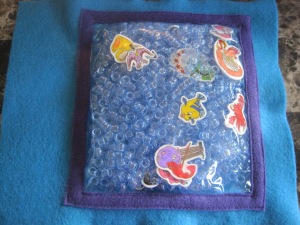 7. Sew the purple border in place over top of the vinyl. I sewed along the outside edge and then the inside edge of the border. This got a little tricky at times because all the beads and images were inside, but just be patient and you’ll get it.
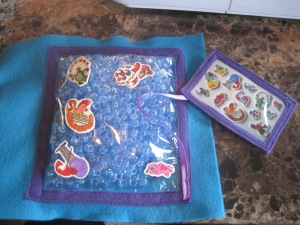 8. Sew the opposite end of the ribbon attached to the card in place as shown.
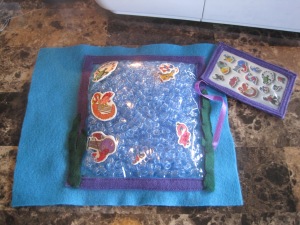 9. Cut out your seaweed from the green felt and tack in place using green thread. And the page is completed!
