“Tiana” Dress Up Apron

My daughter turned three on Friday and she requested a “Tiana” birthday party. I figured now would be a good time to make her a dress up outfit to go along with the the occasion!

Here’s a picture of E with Tiana during our trip to Disneyland last November. She knelt down on her knees, copying Tiana. It was so cute!
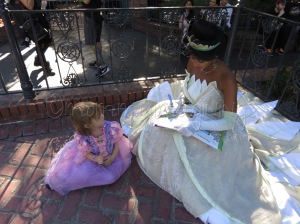

A few tears were shed when E tried on the “Tiana” dress up apron, because it wasn’t poofy, but I think she still likes it since she’s been wearing it all morning!

Want to make one for a special little girl in your life? Here’s how! There are a lot of steps, but I tried to be as thorough as possible so that each step is explained clearly.

THIS PATTERN IS FOR PERSONAL USE ONLY AND NOT FOR SALE. YOU MAY NOT MAKE ITEMS FOR SALE OR PROFIT. IF YOU WOULD LIKE TO SHARE THIS PATTERN, PLEASE GIVE ME CREDIT BY LINKING TO MY PAGE.

Materials:

– light yellow fabric

– green fabric

– ivory tulle (I used tulle on a roll that was 6 in wide since that’s what I had on hand, but I’d recommend the tulle you can buy off the bolt)

– yellow thread

– green thread

– elastic (1 – 1 1/2 inches wide)

– fabric glue

– hook and loop closure

– small piece of felt

– beads or pearls

And here’s how to put it all together! 🙂 

Instructions:

1. The first step is to cut out all the pieces.

Out of the yellow fabric:

Strap: 4 x 22 inches 

Bodice: 8 1/2 x 8 inches (cut 2)

Skirt: 19 x 40 inches (cut 2)

Petals: instructions below – you’ll end up making 9 total

Out of the green fabric:

Waist Band: 3 x 28 inches (cut 2)

Leaves for bodice: instructions below

Leaves for skirt: instructions below

2. Fold the neck strap in half, right sides together, and sew along the long side using a 1/2 in seam allowance. Turn inside out and press. For other aprons I’ve made, I’ve topped stitched along both long sides about 1/4 in from the edge, but I totally forgot this time. I think that it gives a nice airy kind of feel for Tiana’s outfit so I wasn’t too worried.
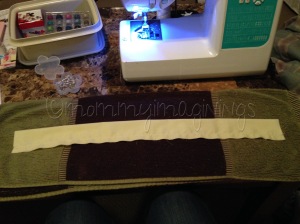
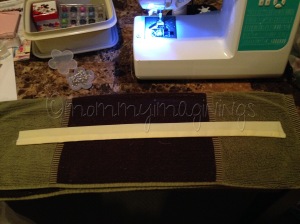

3. Cut a 14 inch piece of 1 inch width elastic. Insert it into the strap. 


4. Line up the ends of the elastic with the ends of the strap and pin or baste in place. The elastic is shorter than the fabric which will allow it to stretch over your little one’s head.


5. Pin the strap to the right side of the bodice front about 1/2 in from the side edges. After I put it all together I realized that the seam from the strap was on the side closest to her neck which shows a bit more, so if you want to avoid that, make sure the seam is on the “outside” when pinning it in place. Baste in place.
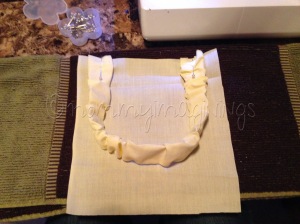

6. Place the back of the bodice on top, sandwiching the strap in the middle. Pin in place then sew around the sides and top using a 1/2 in seam allowance.


7. Turn inside out and press.


8. To make the petals: on a piece of paper, draw a circle with a diameter of about 7 inches, cut out, and then cut in half. Using the pattern you just created, cut the yellow fabric. 

Fold in half and sew along the straight edge using about 1/4 inch seam allowance. 


Turn inside out and, positioning the seam so it runs down the back, sew gathering stitches along the round edge. (I have the seam positioned on the side in the phot, but the petals turn out better if the seam is at the back.)


Gather the rounded edge and your petal should look like a petal.


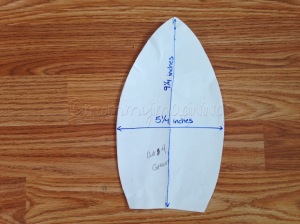
9. To make the bodice leaves: on a piece of paper, draw something that looks like the picture. Once you are satisfied with your pattern, cut four pieces out of the green fabric. Pin and sew two pieces together, using a 1/2 in seam allowance, sewing along the curved edges. Leave the straight edge open so that you can turn it inside out. Turn inside out and press. Repeat with the remaining two green pieces. 


10. Position the bodice leaves on the bodice, pinning just at the top for now. They should slightly overlap. Position three petals behind the green pieces, as shown in the picture, so that when the green is in place no raw edges are seen.


11. Pin the three petals onto the bodice and sew in place. Remove any pins.

12. Pin the green pieces down, adjusting them if necessary so that the raw edges of the petals are hidden. Top stitch about 1/4 in from the edge around the leaves. Start with the leaf on the bottom. I stopped and started again near the straps just so that I could move things out of the way easily and not sew the leaves to the straps. 


13. The stop stitching didn’t attach the leaves to the side of the bodice, so using some fabric glue, I glued down the sides. I put paper inside the leaves first so that the glue wouldn’t seep through to the front.


14. Once the leaves are attached and the glue is dried, trim the bottom of the leaves so they are flush with the bottom of the bodice.

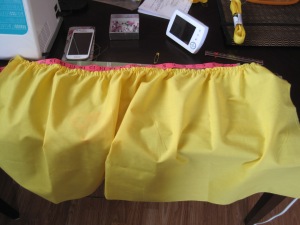
15. Now for the skirt! Pin the two skirt pieces together and sew, using a 1/2 in seam allowance, along the sides and bottom. Trim the corners then turn inside out. Press.


16. I used strips of tulle on this apron, but I recommend using tulle off the bolt. I cut strips a bit longer than the length of the skirt, pinned the on the top, overlapping each strip. Once everything is pinned in place, I trimmed the bottom edges so they were the same length as the skirt. 


17. Sewing gathering stitches along the top of the skirt and gather to a width of 27 inches.


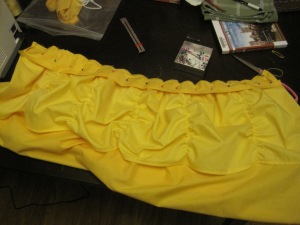
18. Time to make the leaves for the skirts. First you’ll need to create your patterns. They should look something like these: (When looking at the skirt, D will be on the left side and A, B, and C will be on the right with C as the bottom layer and A as the top).


19. Once you are satisfied with your patterns, cut one of each shape out of the green fabric. Hem the rounded edges by folding under 1/4 of an inch and ironing, then fold under again. Sew the hem.

20. Sew gathering stitches along the top straight edges of each leaf piece and gather. 

21. Position the pieces on top of the skirt and pin in place. Sew along the top edge.

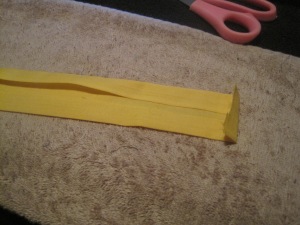
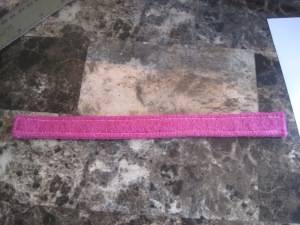
22. Take one waistband piece and fold under all four edges 1/2 inch and press. Repeat with the second waistband piece.


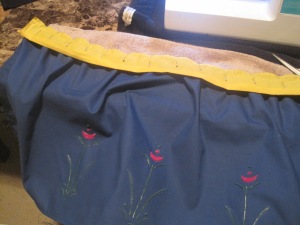
23. Unfold the long edge of one waistband piece and pin along the gathered edge of the skirt front. Sew in place.

  
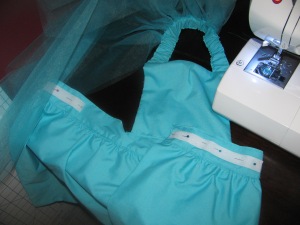
  24. Unfold the other edge of the same waistband piece and pin the bodice in the center. Sew in place. (If you trimmed the bottom of the bodice earlier it won’t stick out like that. I just trimmed it at this stage.)

25. Turn the apron over so the front of the apron is facing away from you and pin the second waistband piece (edges folded under) so that it is lined up with the first piece, covering all the raw edges. Top stitch along all four sides.


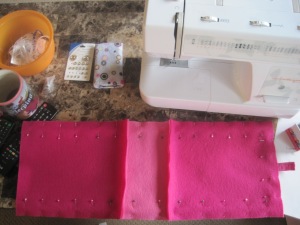
26. Cut a 7 inch length of the hook and loop closure. Pin then sew onto the waistband as shown in the picture.
    
 
27. Almost done! Create 6 more yellow petals as described in step 8. Cut a small circle (about 1 1/2 in diameter) out of felt. Pin and sew on each petal.


28. Sew onto the apron waistband as shown in the picture.
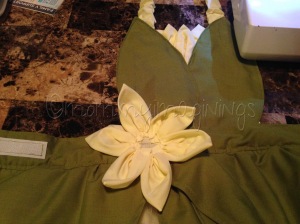

29. Cut a small circle out of green fabric and hand gather the raw edges. Hand sew onto the centre of the flower. Add a few beads or pearls to finish things off!


30. Watch your toddler enjoy her new “dress”!

 
I’d love to hear what you think of this tutorial and how your project turns out!

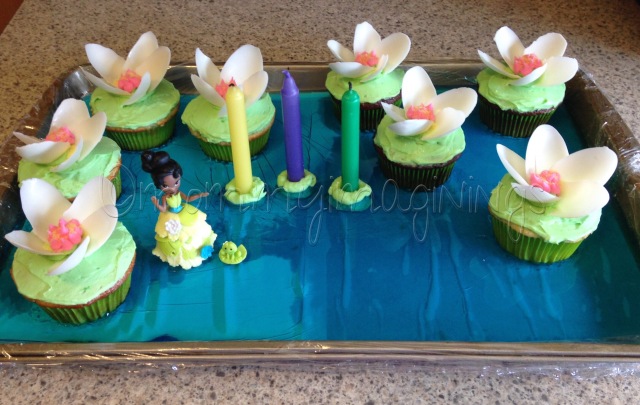
And in case you were wondering…here’s what I did for a cake!

Snow White Towel Cover-Up

I will admit that I’m a little obsessed with all things Disney. Especially when it comes to Disney Princesses! I’m super excited to be taking my 2 year old daughter to Disneyland soon, along with my mom who hasn’t been there in almost twenty years! (Yes, I’m leaving baby C with Daddy!)

When I started this blog, I had no idea what I would end up writing about. I had originally thought that it would have been more “mom” stuff, but after discovering how much fun I am having sewing, it has turned out to be more of a crafting and sewing blog. Hopefully anyone who has taken the time to visit my blog has been enjoying the tutorials I’ve shared.

Today I don’t have a tutorial, but I wanted to share something I made using someone else’s pattern. 

My daughter, E, loves Snow White and so I decided to make her a towel cover-up that looked like her dress. I found the pattern for the peasant dress on this blog, and then made a few changes.

  
1. I split the main part of the dress into two pieces to make a bodice and skirt. I constructed the pattern on paper using her instructions and then cut in the appropriate place to make the bodice and skirt pieces. I then sewed them together to make one piece again. I also sewed a piece of ribbon down the front of the bodice.

2. I added red to the sleeves. I cut six tear drop pieces out of red towel and the attached them to the sleeves using a satin stitch.

3. To give the dress a bit more shape, I added some elastic to the inside of the dress where the blue and yellow met.

We haven’t needed to use a towel cover-up since I’ve made the dress, but E loves wearing it around the house! Here she is admiring herself in front of the mirror the first time she tried it on! Don’t mind the messy room. 😉 


“Anna” Dress-Up Apron and Cape: Now including the tutorials!

The fun thing about having a little girl is that I have an excuse to sew all kinds of fun things! The difficulty with having a toddler is that she can be a bit distructive (although usually not on purpose)! Water and a laptop keyboard just don’t mix. And that is one of the reasons why I haven’t published a post in a very long time! It hasn’t stopped me from sewing and creating though, and here is my latest creation!
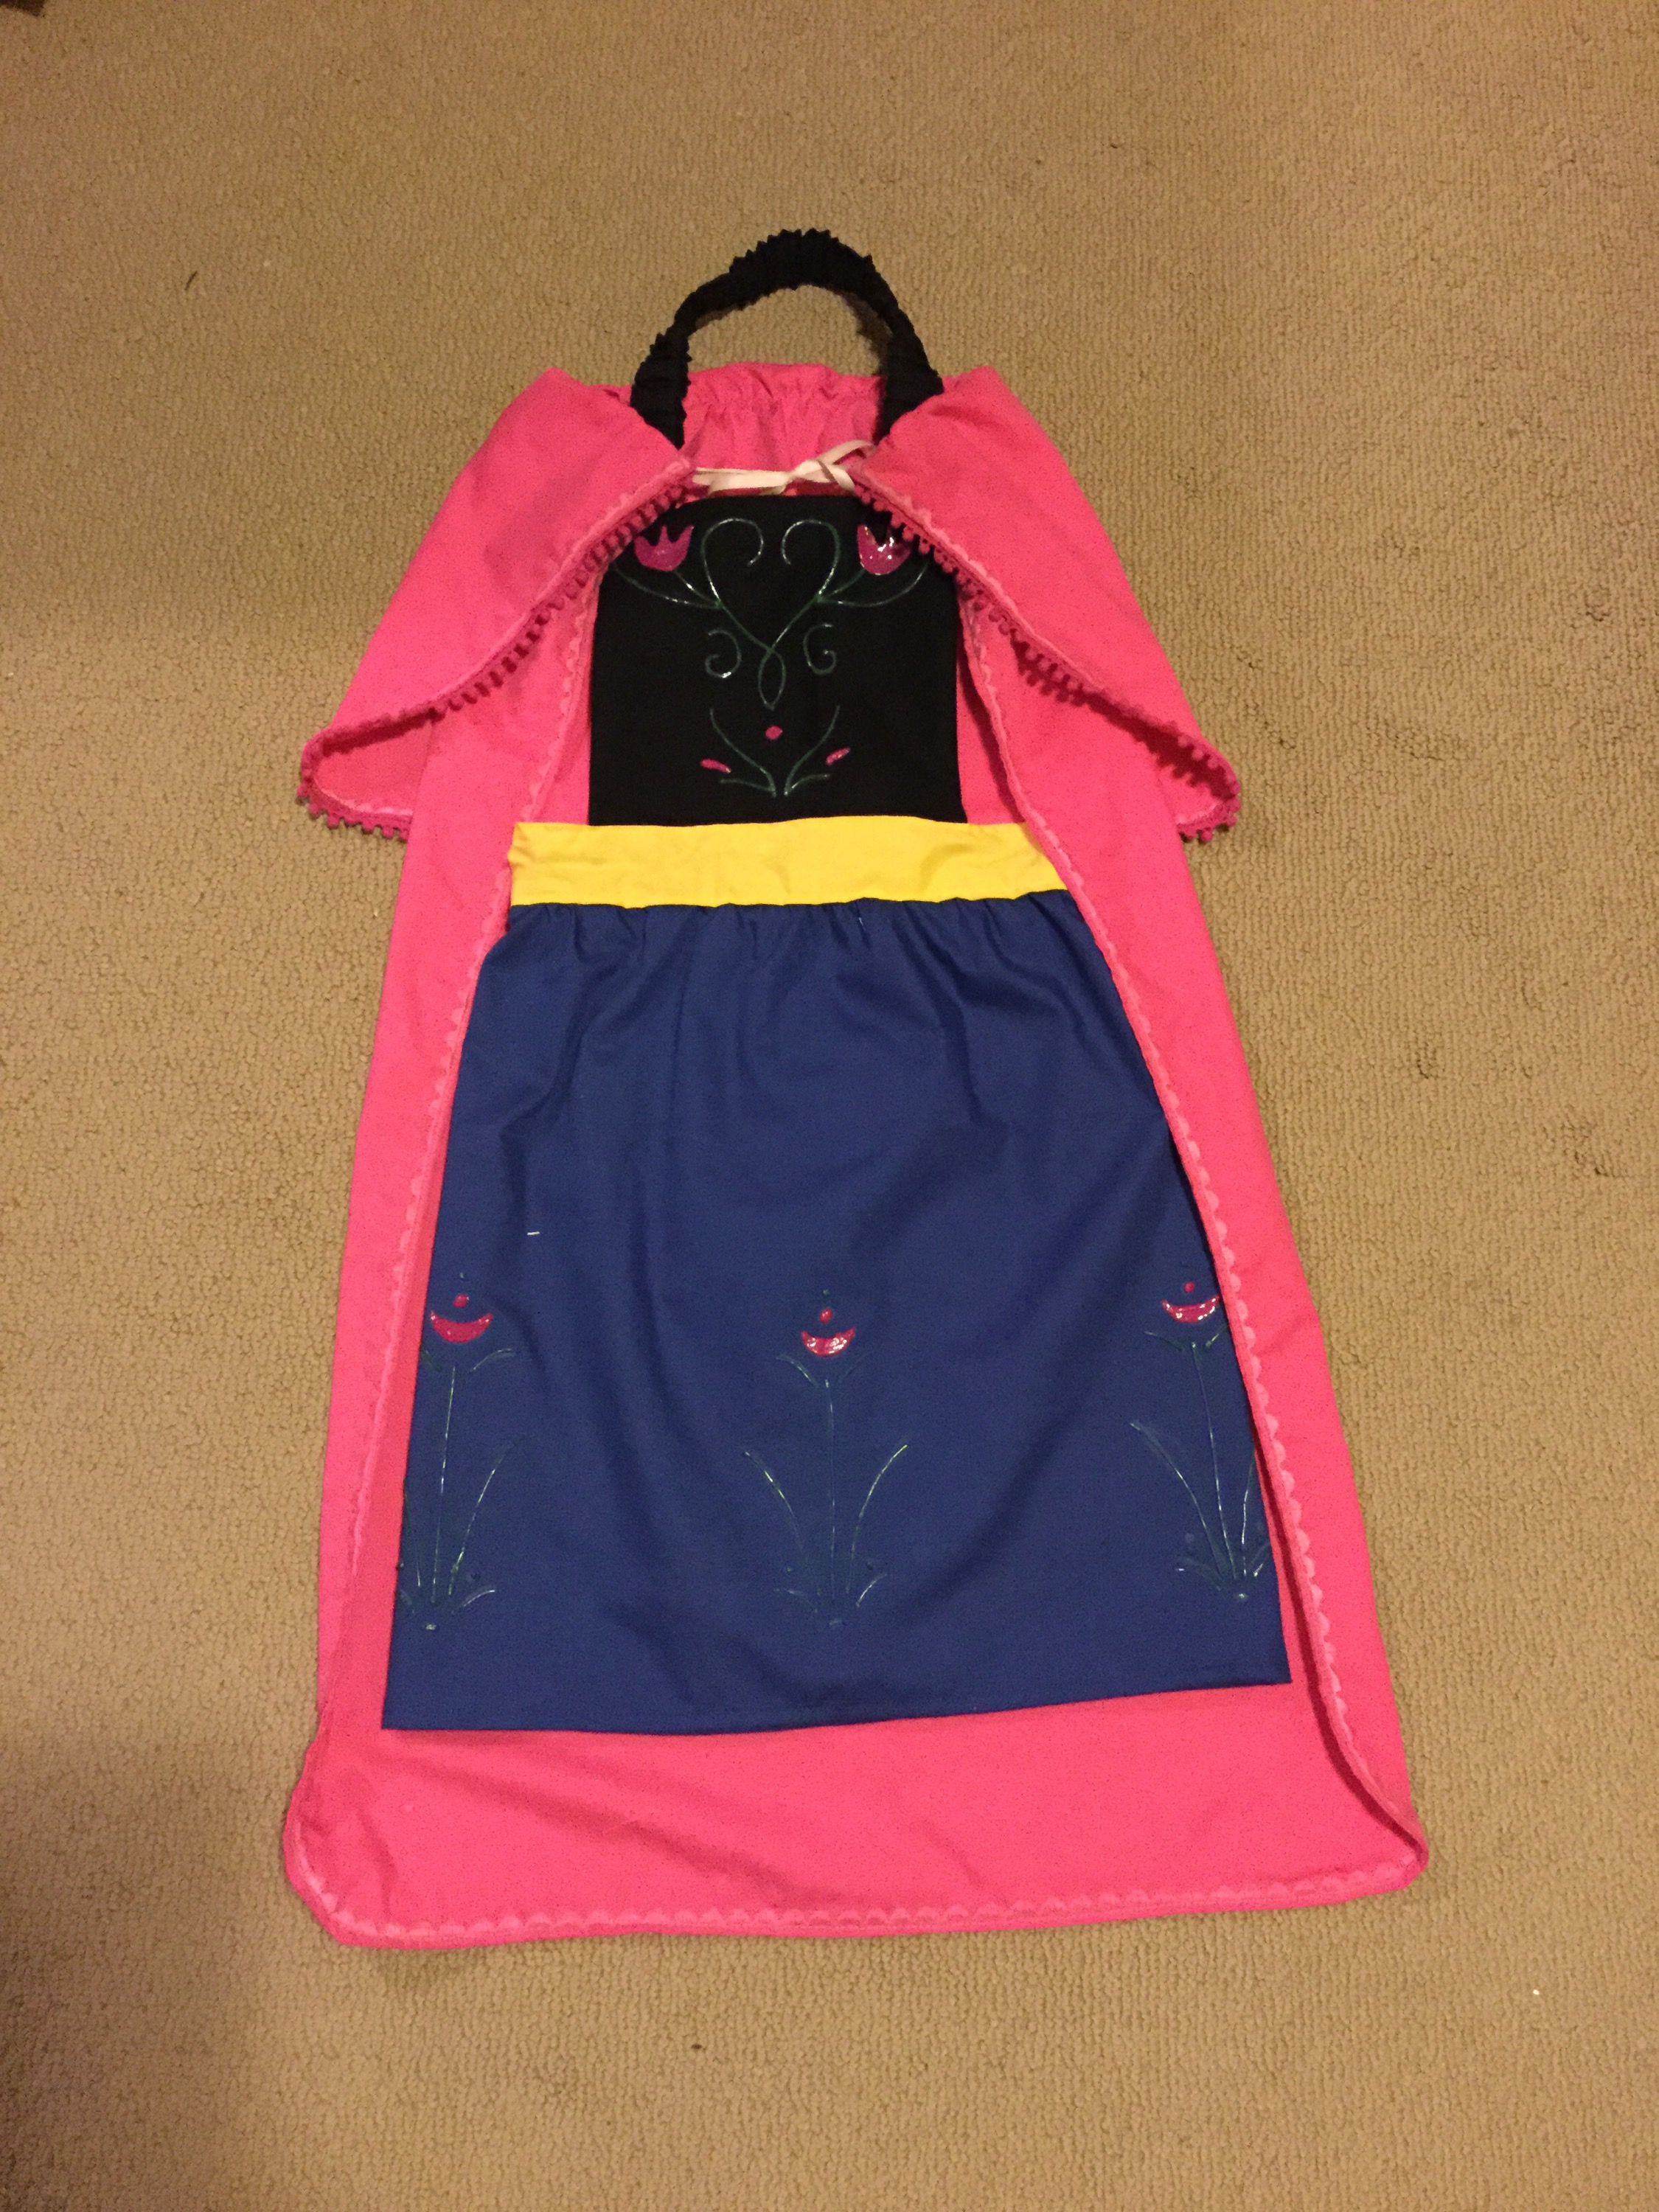
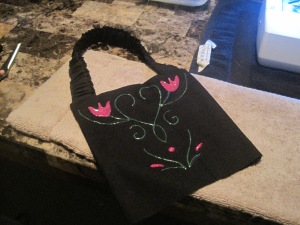
My version of an “Anna” dress-up apron complete with matching cape. I’m SO happy with how it turned out! And my daughter looks so cute in it, especially with her chin length hair in tiny pigtail braids!

Materials:

– dark blue fabric

– black fabric

– yellow fabric

– pink fabric

– elastic (1 inch width – for apron; 1/4 inch width – for cape)

– fabric paint (green and pink)

– hook and loop closure

– 1/4 inch wide ribbon – I used light pink, but any colour could be used

– pompom trim

Instructions for the Cape:

  1. Keeping the fabric doubled as it was on the bolt, cut the pink fabric so that it is about 22 inches by 40 inches. You should end up with two identical pieces.
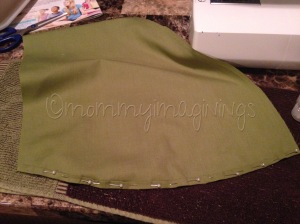
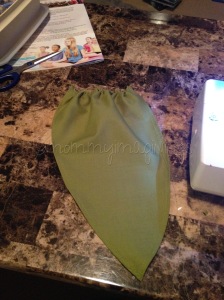
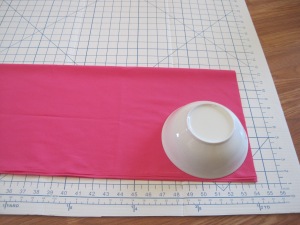
  2. Fold the pieces in half, and using a bowl, round the corners. You should now have two pieces that look like the picture.IMG_5379IMG_5380
  3. Sew around the pieces, leaving a small section for turning, using a 1/2 inch seam allowance. Turn and press. Top stitch around the entire cape.
  4. Fold over the top part of the cape about 11 or 12 inches and iron to make a crease.IMG_5385
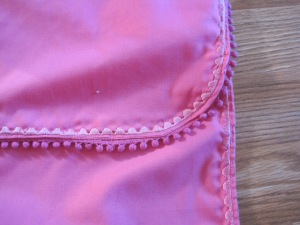
  5. Pin in place, then sew on the pompom trim around the top part of the cape.IMG_5386
  6. This part is optional, but I thought it gave a nice touch. Using a decorative stitch, stitch around the entire cape. You’ll need to do it in two sections – the top part of the cape and the main part of the cape.  If you did it all in one, you’d end up with stitching that was “inside out”.  You want to make sure that the “good” side of the stitching will be facing out when all is said and done.IMG_5389
  7. Pin and sew in place the 1/4 inch wide ribbon along the crease. (It will be under the folded top part of the cape.)IMG_5390
  8. Cut the 1/4 inch wide elastic to 14 inches and sew on top of the ribbon, stretching it as you sew. It will synch up the fabric so that it fits nicely on the shoulders, while also stretching to fit over little heads so Mommy doesn’t always have to be tying a bow!IMG_5392
  9. Fold the top part of the cape over to cover the ribbon and elastic. Tie a knot and bow at the front and you are done!

Instructions for the “Anna” dress-up apron:

  1. The first step is to cut out all the pieces.

Out of the dark blue fabric cut…

  • Skirt: 16 x 38 (cut 2)

Out of the black fabric cut…

  • Strap: 4 x 22 inches
  • Bodice: 8 1/2 x 8 inches (cut 2)

Out of the yellow fabric cut…

  • Waist Band: 3 x 28 inches (cut 2)
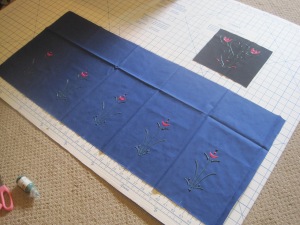
  1. Take one of the black bodice pieces and one of the dark blue skirt pieces and decorate them using the green and pink fabric paints. I just freehanded it based on pictures from a Google image search of Anna’s dress. I did draw on the fabric first with a fabric pencil, but if you are feeling brave, you probably don’t even need to do that step.  Let it dry completely!IMG_5482
  2. Fold the neck strap in half, right sides together, and sew along the long side using a 1/2 in seam allowance. Turn inside out, press, and top stitch along both long sides about 1/4 in from the edge.IMG_5483
  3. Cut a 15 inch piece of 1 inch width elastic.  Insert it into the strap.IMG_5486
  4. Line up the ends of the elastic with the ends of the strap and pin or baste in place. The elastic is shorter than the fabric which will allow it to stretch over your little one’s head.IMG_5487
  5. Pin the strap to the right side of the bodice front (the one you painted) about 1/2 inch from the side edges. There will be 1/2 inch of the strap going over the top edge. Baste in place.IMG_5491
  6. Place the back of the bodice on top, sandwiching the strap in the middle. Pin in place then sew around the sides and top using a 1/2 inch seam allowance.IMG_5493
  7. Turn inside out and press.IMG_5495
  8. Take one waistband piece and fold under all four edges 1/2 inch and press. Repeat with the second waistband piece.IMG_5503
  9. Take the two layers of the skirt, and right sides together, sew around the sides and bottom. Turn and press. (You might not notice from pictures, but I didn’t end up doing this step.  I that thought that I had bought enough blue fabric, but I didn’t have enough to cut two skirt pieces.  If you are in a similar predicament, simply hem the sides and bottom of your decorated skirt piece.)  Sew gathering stitches along the top of the skirt and gather to a width of 27 inches.IMG_5498
  10. Unfold the long edge of one waistband piece and pin along the gathered edge of the skirt front. Sew in place.IMG_5504
  11. Unfold the other edge of the same waistband piece and pin the bodice in the center. Sew in place.IMG_5507
  12. Turn the apron over so the front of the apron is facing away from you and pin the second waistband piece so that it is lined up with the first piece, covering all the raw edges. Top stitch along all four sides.IMG_5511
  13. Cut a 7 inch length of the “hook” part of the hook and loop closure and a 4 inch length of the “loop” part. Sew onto the waistband as shown in the picture.IMG_5520

And just like that you have completed the “Anna” dress-up apron!  I’d love to hear how it turned out!IMG_5522IMG_5525

THIS PATTERN IS FOR PERSONAL USE ONLY AND NOT FOR SALE.  YOU MAY NOT MAKE ITEMS FOR SALE OR PROFIT.  IF YOU WOULD LIKE TO SHARE THIS PATTERN, PLEASE GIVE ME CREDIT BY LINKING TO MY PAGE.


Thanks for stopping by and as soon as I get my pictures uploaded I’ll write out the instructions for making your own, so check back soon!

“Elsa” Dress-Up Apron

IMG_0130I had such fun making the “Belle” Dress-Up Apron that I just couldn’t stop there!  My daughter has recently started watching Frozen.  I think we have watched it at least once a day for the past week.  She hasn’t learned to sing yet, but I’m sure she’ll be singing the songs once she does!

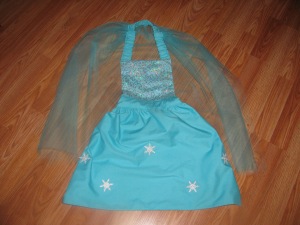
I’m excited with how the “Elsa” Dress-Up Apron turned out.  Here’s how I made it.


Materials:

– 1 m teal fabric

– 0.2 m sparkly fabric for the bodice (I found some tulle with sequins on it in the bridal section of the fabric store)

– 1 m tulle

– 15 inches of elastic (1 inch)

– snowflake embellishments (optional, but pretty cute)

– hook and loop closure

Instructions:

1. The first step is to cut out all the pieces.

Out of the teal fabric cut…

  • Strap: 4 x 22 inches
  • Bodice: 8 1/2 x 8 inches (cut 2; you’ll only need 1 if you are using an opaque fabric for the front of the bodice)
  • Waist Band: 3 x 27 inches (cut 2)
  • Skirt: 16 x 38 (cut 2)

Out of the sparkly fabric cut…

  • Bodice: 8 1/2 x 8 inches (cut 1)

2. When I bought the tulle it was already doubled (as many fabrics are when on the spools).  Keeping it folded, trim the edges so that they were nice and straight.  Sew gathering stitches along the folded edge of the tulle and gather to about 12 inches.IMG_0101

3. Take the strap piece.  Fold in half and press.  Fold and press each edge up by 1/2 in.  Position the tulle in the middle of the strap so that it is overlapping the folded edge.  Fold the strap in half and pin everything in place.

IMG_0104 IMG_0105

4. Top stitch along both edges about 1/4 in from the edge, securing the tulle in place.  Your strap should now look something like the picture.IMG_0107

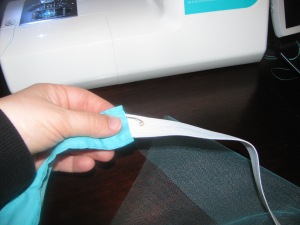
5. Using a safety pin, insert the elastic into the strap.  Line up the ends of the elastic with the ends of the strap and pin or baste in place.  The elastic is shorter than the fabric which will allow it to stretch over your little one’s head.

IMG_0109 IMG_0111

6. If your sparkly fabric is transparent, as mine was, sew it on top of one of the teal bodice pieces.

7. Pin the strap to the right side of the bodice front about 1/2 in from the side edges.  There will be 1/2 inch of the strap going over the top edge.  Baste in place.  Note the position of the tulle!IMG_0112

8. Place the back of the bodice on top, sandwiching the strap in the middle.  Pin in place then sew around the sides and top using a 1/2 in seam allowance.  Your bodice should now look something like the picture.

IMG_0113 IMG_0115

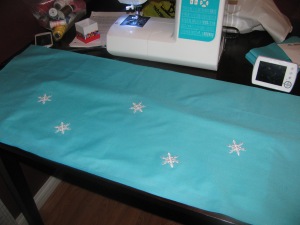
9. Take one of the skirt pieces and attach your snowflake embellishments.  Mine were iron on, but now that I’ve watched my daughter play in her new “dress” I think I’m going to need to sew them on.IMG_0117

10. Place the second skirt piece over top, sew around the sides and bottom edge using a 1/2 in seam allowance, and turn.  Sew gathering stitches along the top of the skirt and gather to 27 inches.IMG_0119

11. Taking both waistband pieces, fold and press under all the edges 1/2 inch.IMG_0121

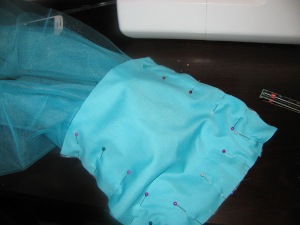
12.  Unfold the edge of one waistband piece and pin to the skirt, right sides together as shown in the picture.  Sew in place.IMG_0124

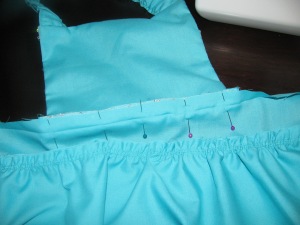
13. Pin the bodice, right sides together, in the centre of the waistband piece and sew in place.IMG_0125

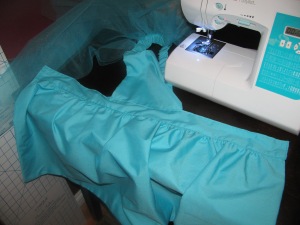
14. Place the second waistband piece, edges folded under, so that it covers all the seams and raw edges.  Top stitch in place 1/4 inch from the edges.IMG_0127

15. Cut the hook and loop closures and sew on to the waistband.  I sewed the “hook” part so that it would be on the top of the skirt when wrapped around my daughter’s waist, that way it would be less likely to catch on the tulle.IMG_0128

16. Admire your completed project and watch your little one enjoy her new “dress”!IMG_0130

“Belle” Dress Up Apron

IMG_0066Part of our morning routine involves putting on a movie for my daughter to watch.  E has been enjoying watching lots of Disney movies and one of her current favourites is “Beauty and the Beast”.  She also loves to dress up so I figured it was time to try my hand at making a “Belle” dress-up apron like I’d seen on Pinterest.

After looking at several patterns and pictures, I decided how I was going to proceed.  I got most of my measurements and inspiration from this site, but then made some modifications which I’ll share in this post.  One of the things I modified was the neck strap.  With a newborn at home now, I wanted to make sure that my daughter would be able to put on and take of the “dress” with as little help from me as possible.  The neck strap stretches over her head instead of having it tie in the back.  I ended up having to go back and shorten the elastic to make the neck strap a better size, so the pictures show a longer neck strap than you’ll get if you follow the instructions.

Materials:

– dark yellow fabric

– light yellow fabric

– elastic (in two widths – 1 inch and 1/4 inch)

– hook and loop closure

Instructions:

1. The first step is to cut out all the pieces.

Out of the dark yellow fabric cut…

  • Strap: 4 x 22 inches
  • Bodice: 8 1/2 x 8 inches (cut 2)
  • Waist Band: 3 x 28 inches (cut 2)
  • Skirt: 16 x 38 (cut 2)

Out of the light yellow fabric cut…

  • Skirt Overlay: 12 x 42 inches

IMG_52352. Fold the neck strap in half, right sides together, and sew along the long side using a 1/2 in seam allowance.  Turn inside out, press, and top stitch along both long sides about 1/4 in from the edge.


IMG_5237

3. Cut a 15 inch piece of 1 inch width elastic.  Insert it into the strap.


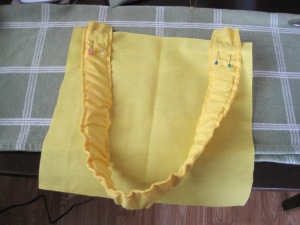
IMG_52404. Line up the ends of the elastic with the ends of the strap and pin or baste in place.  The elastic is shorter than the fabric which will allow it to stretch over your little one’s head.


IMG_52415. Pin the strap to the right side of the bodice front about 1/2 in from the side edges.  There will be 1/2 inch of the strap going over the top edge.  Baste in place.


IMG_52426. Place the back of the bodice on top, sandwiching the strap in the middle.  Pin in place then sew around the sides and top using a 1/2 in seam allowance.


IMG_52437. Turn inside out and press.

8. Take one waistband piece and fold under all four edges 1/2 inch and press.  Repeat with the second waistband piece.


IMG_52459. Sew gathering stitches along the top edge of each dark yellow skirt piece and gather to 27 inches.  Set aside.

10. Take the skirt overlay piece and hem the bottom: press the bottom edge 1/4 in under, then fold over again, press, and sew the hem.


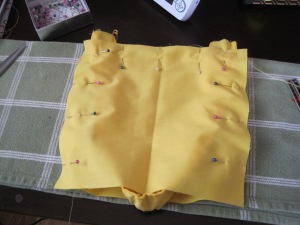
IMG_524611. Mark on the wrong side of the skirt overlay, every 7 inches along the bottom as well as at the top, approximately 1 inch from the top edge.  Cut five lengths of the 1/4 inch elastic to 7 1/2 inches.  Pin the elastic at the marks you just made.  (The hemmed bottom of the skirt is at the top of the picture.)


IMG_524812. Sew along the elastic, stretching it so it lays flat against the fabric.  Once sewn, because the elastic is shorter it will create the gathers.


IMG_525013. Sew gathering stitches along the top edge of the skirt overlay and gather to 27 inches.


IMG_525114. Place the overlay on top of the skirt front.  Baste along the sides and gathered edge.


IMG_525215. Place the back of the skirt over the front piece, right sides together, and sew along the bottom and sides.  Turn inside out and baste gathered edges together.


IMG_525316. Unfold the long edge of one waistband piece and pin along the gathered edge of the skirt front.  Sew in place.


IMG_525417. Unfold the other edge of the same waistband piece and pin the bodice in the center.  Sew in place.

18. Turn the apron over so the front of the apron is facing away from you and pin the second waistband piece so that it is lined up with the first piece, covering all the raw edges.  Top stitch along all four sides.


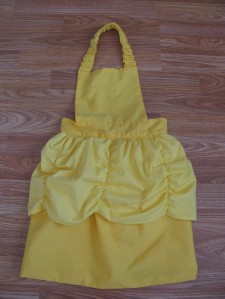
IMG_525619. Cut a 7 inch length of the “hook” part of the hook and loop closure and a 4 inch length of the “loop” part.  Sew onto the waistband as shown in the picture.


IMG_525820. Watch your toddler enjoy her new “dress”!


Now to wait for another sale at the fabric store so I can make Cinderella and Sleeping Beauty aprons…and maybe some other princesses too! 🙂


THIS PATTERN IS FOR PERSONAL USE ONLY AND NOT FOR SALE.  YOU MAY NOT MAKE ITEMS FOR SALE OR PROFIT.  IF YOU WOULD LIKE TO SHARE THIS PATTERN, PLEASE GIVE ME CREDIT BY LINKING TO MY PAGE.

Quiet Book Cover

Now that the tutorials for the pages in the Disney Princess Inspired Quiet Book have been posted, it is time for the finishing touches – sewing the pages together and creating the cover.

First, sewing the pages together.  When I created the quiet book, I completed all the pages and then sewed them together.  That means that each of the pages had about 1/2 inch on three sides that “disappeared” when sewn to the next page.  The fourth side is used for binding the book together.

I only have a few pictures of putting the pages together, so hopefully my instructions will be clear enough.  If not, comment below and I’ll try to clear things up!  🙂

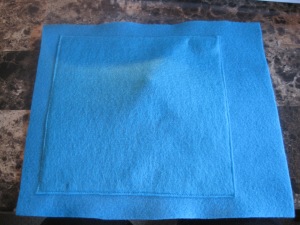
IMG_40411. For the first (and last – which is what I’m showing in the pictures) page in the book, take a plain piece of felt, cut to 10 x 8 1/2 inches.  Place it over the “right” side of the quiet book page (the side with all the details).  Pin on the three outer edges.

IMG_4042If you were to flip it over, you’ll see the back of the quiet book page.

Sew around the three edges, using a 1/2 in seam allowance.  Trim the sewn corners and turn inside out.

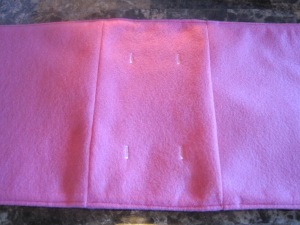
IMG_40452. Fold the open edges under about 1/2 in and top stitch around all four edges.

IMG_40463. Sew a straight line about 1 1/2 in from the side that doesn’t contain the page details.

4. Create small button holes 2 inches from the top and bottom.


And now for the cover…

Materials:

– five pieces of felt (I used two pieces of sparkly felt and three pieces of plain pink felt)

– snap

– ribbon

IMG_40501. Cut both pieces of sparkly felt so that they are 10 1/2 x 9 inches.  Cut one of the plain pink felt pieces to 4 1/2 x 9 inches.  Pin and sew this to the sparkly felt as shown in the picture.  Cut another piece of plain pink felt to 4 1/2 x 9 inches and sew to the other two full pieces of pink felt.


IMG_40582. Cut some sparkly felt to 9 x 2 inches and fold in half.  Fold over the edges of one side as shown in the picture.  Sew along the edge.  Turn inside out.

IMG_4061Top stitch around the edges.


IMG_40633. Place the inside of the cover so the “right” side is facing you.  Pin the strap in place.  You can see it sticking out in the picture.  Place the outside of the cover on top so the “wrong” side is facing you.  The “right” sides will be together.

IMG_4064Sew along the top, bottom, and side with the strap.  Trim the corners and turn inside out.


4. Fold the open edges under 1/2 in and top stitch around the entire cover about 1/4 in from the edge.

IMG_40735. Create four button holes from the top and bottom edges so that they are the same distance from each other as the quiet book pages.


IMG_40766. Cut a piece of ribbon and thread it through the cover and page button holes.  Tie the ribbon with a double knot and then a bow.


IMG_42427. Attach the snap to the cover and strap.

Enjoy your completed book!

THESE PATTERNS ARE FOR PERSONAL USE ONLY AND NOT FOR SALE.  YOU MAY NOT MAKE ITEMS FOR SALE OR PROFIT.  IF YOU WOULD LIKE TO SHARE THESE QUIET BOOK PAGES, PLEASE GIVE ME CREDIT BY LINKING TO MY PAGE.

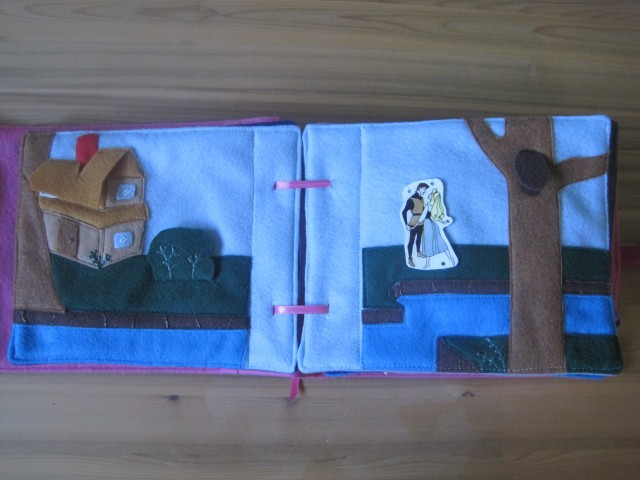
Disney Princess Inspired Quiet Book: Sleeping Beauty Pages

Thank you so much for your patience waiting for the rest of the tutorials for my Disney Princess Inspired Quiet Book.  Today I’m going to share how to complete the Sleeping Beauty Search and Find Pages.

IMG_4084

Don’t forget to check out my completed Disney Princess Inspired Quiet Book!

NOTE: When I created the quiet book, I completed all the pages and then sewed them together.  That means that each of the pages has about 1/2 inch on three sides that will “disappear” when sewn to the next page.  The fourth side will be used for binding the book together.  You can see the finished book here.  The instructions for the binding will be in a future post.

THESE PATTERNS ARE FOR PERSONAL USE ONLY AND NOT FOR SALE.  YOU MAY NOT MAKE ITEMS FOR SALE OR PROFIT.  IF YOU WOULD LIKE TO SHARE THESE QUIET BOOK PAGES, PLEASE GIVE ME CREDIT BY LINKING TO MY PAGE.

Materials:

– felt (light blue, dark blue, green, dark brown, light brown, beige, gold, red)

– fabric paint (brown, green)

– glue

– Shrinky Dink Plastic

– Search and Find Pattern

Instructions:

1. Trim both background light blue felt so it is 10 inches by 8 1/2 inches (this will be the standard size for all the pages in this quiet book).

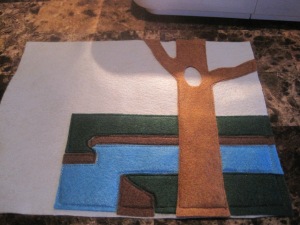
IMG_37952. First the right hand page.  Cut out the various pieces for the landscape and sew in place as shown.  I started at the bottom and worked my way up.  It meant switching thread in the sewing machine each time, but it also meant that everything would fit together.


IMG_37993. Cut the hole out of the tree and sew the tree in place.  From the dark brown felt, cut two dark brown ovals the same size as the hole in the tree.  Glue one in the hole (only glue around the edges otherwise sewing on the owl is a lot more work) and the second one, sew along the top to make a flap.


IMG_38564. The left hand page is a bit more time consuming.  Cut out the pieces and sew in place as shown in the picture.  Sew the bush only along the bottom edge to create a flap that opens downwards.  Sew the roof along the top to create the flap.


IMG_38605. I found pictures using a Google search for the couple dancing, the owl, and the fairies.  It took a bit of trial and error to get things to the size I wanted, so be patient with this step.  I traced the images onto the Shrinky Dink plastic and then coloured with permanent markers.  Once they were shrunk, I put a layer of clear nail polish over top to keep the colour from being worn off.  Don’t forget to make holes in your shapes before you shrink them so that you can sew them onto the page!  Sew in place.

IMG_38626. Using the fabric paint, paint on the details as shown in the pictures.  Let dry and the pages are complete!


Disney Princess Inspired Quiet Book: Marble Maze and I-Spy

The Little Mermaid – one of the first movies I remember seeing in the movie theatre. Today I’ll be sharing the tutorial for making The Little Mermaid inspired pages.

IMG_4099

Don’t forget to check out my completed Disney Princess Inspired Quiet Book!

NOTE: When I created the quiet book, I completed all the pages and then sewed them together. That means that each of the pages has about 1/2 inch on three sides that will “disappear” when sewn to the next page. The fourth side will be used for binding the book together. You can see the finished book here. The instructions for the binding will be in a future post.

THESE PATTERNS ARE FOR PERSONAL USE ONLY AND NOT FOR SALE. YOU MAY NOT MAKE ITEMS FOR SALE OR PROFIT. IF YOU WOULD LIKE TO SHARE THESE QUIET BOOK PAGES, PLEASE GIVE ME CREDIT BY LINKING TO MY PAGE.

Materials:

– felt (turquoise, purple, green)

– marble

– ribbon

– clear vinyl (rather than buying vinyl at the fabric store I used the packaging from an item I bought at the Dollar store)

– Shrinky Dink plastic

– permanent markers

– clear nail polish

– seed beads (at least that’s what I think they are called)

Instructions for Marble Maze page:

1. Trim the background turquoise  felt so it is 10 inches by 8 1/2 inches (this will be the standard size for all the pages in this quiet book).

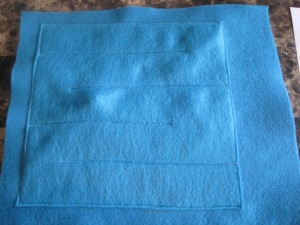
2. Cut a second turquoise felt so that it is 7 1/4 in by 7 in.
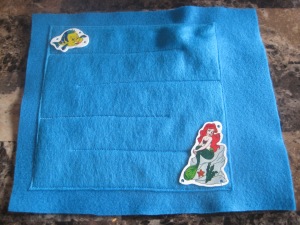
IMG_40193. Sew the square on top of the background felt about 3/4 in from the left hand edge of the background felt.  Once you have three of the sides sewn in place, put the marble underneath and sew the fourth edge in place.


IMG_40224. Moving the marble as needed, sew the maze lines as shown.  Each section is about 3 1/2 in wide


5. Create your figures for added interest.  I found some images through a Google search and printed them in the size I needed based on how much the Shrinky Dink plastic would shrink.  Once I had the images sized, I traced them onto the Shrinky Dink plastic, coloured them with permanent markers, punched the holes for sewing, and heated them in the oven.  Once they were out of the oven and cooled, I painted them with the clear nail polish.  (I found that some colours, like red, tended to run even though they were permanent markers.  To avoid that, let the nail polish drop onto the image instead of painting the polish.  Hopefully that makes sense.)

IMG_40236. Once the polish is dry, sew the images in place and the pages is completed!


Instructions for I-Spy Page

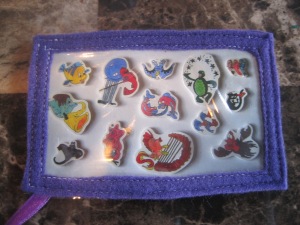
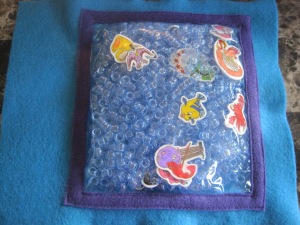
IMG_39231. First create your images.  You could either find stuff to put in or create them yourself.  I decided that I wanted to do an “Under the Sea” theme and found images through a Google search.  I think traced the images onto Shrinky Dink plastic.  Once I had traced the image on one side, I flipped it over and went over the same lines, making the image double sided.  I then coloured the images using permanent marker, trimmed the images, and put them in the oven.  Once shrunk and cooled, I coated them with clear nail polish, letting the first side dry before repeating on the opposite side.

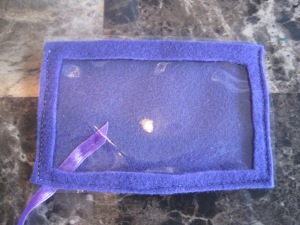
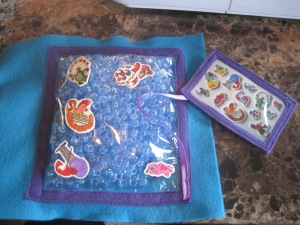
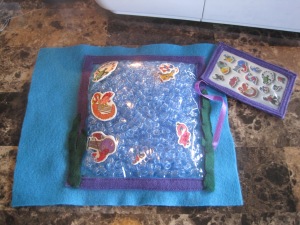
IMG_40122. Take a picture of the items.  I printed the picture then bordered it with purple felt.  This was just free hand so I don’t have a pattern for it.  The back is solid purple; the front is vinyl bordered with purple felt.

IMG_4013Sew the pieces together on three sides, remembering to put the ribbon in place.

IMG_4014Insert the picture and sew up the fourth side.


3. Trim the background turquoise  felt so it is 10 inches by 8 1/2 inches (this will be the standard size for all the pages in this quiet book).

4. Cut the purple felt so that it is 6 1/2 in by 7 in.  Then cut out the centre so that the edge is 1/2 in thick on each side.

5. Cut the vinyl so that it is 6 in by 6 3/4 in.

IMG_39686. Pin (place the pins parallel to the edge of the vinyl instead of perpendicular so you only make holes in it where it would be sewn anyways) and sew the vinyl in place on three sides – 1 3/8 in from the right side of the background felt, 1 in from the bottom of the background felt, and 3 in from the left side of the background felt.  It will be puffy in the middle since you will need room to put in the beads.  Pour in the seed beads and images and sew the top in place 1 in from the top.


IMG_39697. Sew the purple border in place over top of the vinyl.  I sewed along the outside edge and then the inside edge of the border.  This got a little tricky at times because all the beads and images were inside, but just be patient and you’ll get it.


IMG_40158. Sew the opposite end of the ribbon attached to the card in place as shown.


IMG_40169. Cut out your seaweed from the green felt and tack in place using green thread.  And the page is completed!

Disney Princess Inspired Quiet Book: Frozen Pages

Thank you SO much for your patience while waiting for the rest of the patterns and tutorials for the quiet book.  Today I’ll be sharing how to complete the Frozen pages.

IMG_4106

Please note that the Elsa figure was created based on someone else’s pattern so I won’t be able to share that part, but the rest will be explained in this tutorial.

Don’t forget to check out my completed Disney Princess Inspired Quiet Book!

NOTE: When I created the quiet book, I completed all the pages and then sewed them together.  That means that each of the pages has about 1/2 inch on three sides that will “disappear” when sewn to the next page.  The fourth side will be used for binding the book together.  You can see the finished book here.  The instructions for the binding will be in a future post.

THESE PATTERNS ARE FOR PERSONAL USE ONLY AND NOT FOR SALE.  YOU MAY NOT MAKE ITEMS FOR SALE OR PROFIT.  IF YOU WOULD LIKE TO SHARE THESE QUIET BOOK PAGES, PLEASE GIVE ME CREDIT BY LINKING TO MY PAGE.

Materials:

– felt (light blue, white, sparkly white, green, gold, dark brown)

– ribbon

– fabric paint (brown, silver)

– glue

– Snowflakes Page Pattern and Build a Snowman Page Pattern

Instructions:

1. I’ll first show the Snowflakes page.  Trim the background light blue felt so it is 10 inches by 8 1/2 inches (this will be the standard size for all the pages in this quiet book).

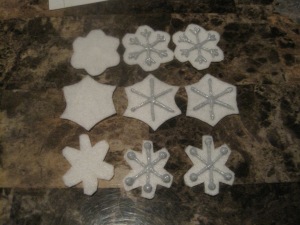
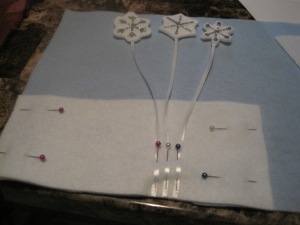
IMG_34572. Cut out three of each snowflake from white felt.  Using the sliver fabric paint, draw the snowflake details on two of the snowflakes.  Let dry completely.


3. Cut three pieces of ribbon and glue in between a blank snowflake and a painted snowflake.  Let dry completely.

IMG_34644. Place the Ground Snow piece in place and pin the other end of the ribbons as shown in the picture.  Sew around the edges.


IMG_34675. Place the Pocket piece in place over top of the ribbon and sew the bottom and up about a centimeter on both sides.  This will be where the snowflakes can be stored when not in use.


IMG_3468_16. Glue the second snowflakes in the sky and let dry completely.

7. Add an Elsa doll of your own creation to complete the page.


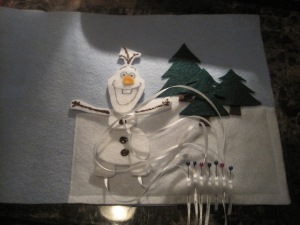
$RBR5Z3Q8. To create Olaf I used a pattern found on this page.  I altered the size when I printed it so that it would fit properly on the felt page.  I don’t have a picture because it was lost, but each shape is cut out twice and a ribbon glued in between.  The ribbon does get in the way a bit, but it helps to keep all the pieces with the page.

9. Cut out Olaf’s nose from gold felt and using an orange marker, draw a few lines to add some detail.  Use a permanent black marker to draw his face on the felt.  Use the brown fabric paint to draw the stick hair, his arms, and buttons.  Let dry completely.

$R749KYY10. Sew the Ground Snow in place and glue the trees and trunks onto the page as shown.  Pin the opposite ends of the ribbon as shown and sew in place.  Trim the ribbons if needed.


$R73806N11. Sew the pocket piece in place, covering the ribbon ends.  And the page is done!

Disney Princess Inspired Quiet Book: Snow White Pages FREE Pattern and Tutorial

It has been WAY too long since I’ve posted a tutorial for my Disney Princess Inspired Quiet Book.  Today I’m going to show two pages at once since they aren’t too complicated.  So here are the patterns and instructions for the Snow White pages of the book.

IMG_4091


Don’t forget to check out my completed Disney Princess Inspired Quiet Book!

NOTE: When I created the quiet book, I completed all the pages and then sewed them together.  That means that each of the pages has about 1/2 inch on three sides that will “disappear” when sewn to the next page.  The fourth side will be used for binding the book together.  You can see the finished book here.  The instructions for the binding will be in a future post.

THESE PATTERNS ARE FOR PERSONAL USE ONLY AND NOT FOR SALE.  YOU MAY NOT MAKE ITEMS FOR SALE OR PROFIT.  IF YOU WOULD LIKE TO SHARE THESE QUIET BOOK PAGES, PLEASE GIVE ME CREDIT BY LINKING TO MY PAGE.

Materials:

– felt (light gray, dark gray, gold, brown, sparkly white, red)

– beads (15 in total for the counting part; small ones for the trolley)

– ribbon

– fabric paint (brown, silver)

– glue

– buttons (2 for the wheels on the trolley)

– non-breakable mirror (I got mine from a baby toy that I found at Value Village; any shape will work)

– Counting Page Pattern

Instructions:

1. I’ll first show the mirror page.  Trim the background light gray felt so it is 10 inches by 8 1/2 inches (this will be the standard size for all the pages in this quiet book).

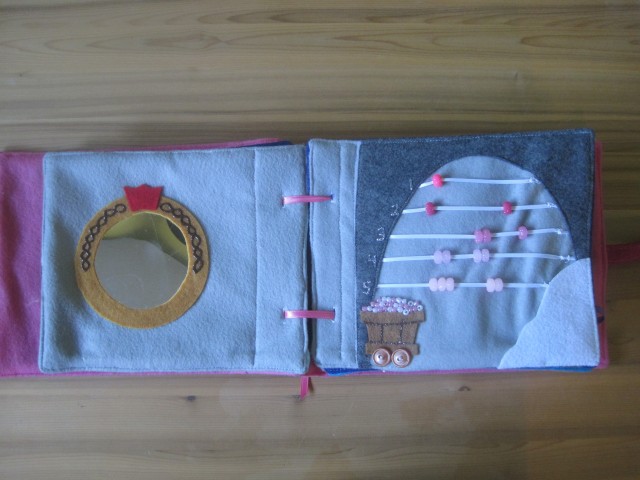
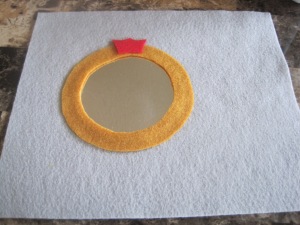
IMG_37442. To make the mirror frame, I traced the mirror onto a piece of paper.  Then I drew a line on the inside of the circle so that it would overlap with the mirror when cut out of felt.  I made the frame about 1/2 inch thick.  Draw a crown on paper for your pattern as well.  Cut out the pieces from the felt.


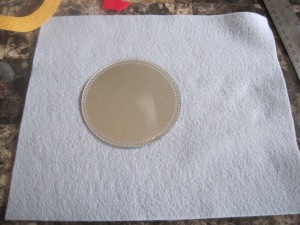
IMG_37453. Glue the mirror onto the felt, slightly to the left so that it will be in the centre of the finished page.


IMG_37464. Glue the gold frame over top of the mirror.  I placed glue so that it would stick to the background as well as the mirror.


IMG_37475. Glue on the red crown at the top of the mirror.


IMG_37796. Finally, paint on the pattern with the brown fabric paint.  If you look closely you’ll notice that I did more loops on one side than the other, but I don’t think my daughter has noticed.  And the page is done!


7. Sadly, I have lost the pictures for the steps for the counting page due to keyboard smashing by my daughter.  😦  (Check out this post to read the details).  However, I will still write down the steps and the pattern is given above.

Trim the background light gray felt so it is 10 inches by 8 1/2 inches (this will be the standard size for all the pages in this quiet book).

8. Cut the “Cave” out of dark gray and position on the right side of the background felt.  Don’t sew it down yet.

9. Cut five ribbon pieces and pin in place, under the dark gray cave.  Move the cave piece out of the way and sew the ribbon on one side.  String the beads on the ribbons as shown in the finished page.

10. Pull the ribbon tight, pin in place, and sew the opposite end.  If you find that the ribbons are droopy, simply pull it a little tighter and resew.  Remember, it doesn’t have to be perfect.

11. Reposition the cave piece and sew in place.  Using the sliver fabric paint, write the numbers as shown.

12. Cut the “Pile of Jewels” from sparkly white and sew in place on the bottom right-hand corner.

13. Cut out the “Trolley” and sew in place as shown.  Using brown fabric paint, paint on the details of the trolley.

14. Sew on small beads, “filling” the trolley with jewels.

15. Sew on the buttons to make the wheels of the trolley.  And you are done!


I hope you have fun making these pages.  I’d love to hear how yours turned out!

Binding instructions will be in a future post!