A Weekend Away!

This weekend I did something that I had never done before. It wasn’t a crazy thing to do, or something that is unheard of, but it was something that I desperately needed and quite enjoyed. 

I left the kids with my husband and went away for the weekend.

This might sound like an obvious thing for a mother to do, but it took me awhile to get to the point where I was ready for it. About a month or so ago I was having a rough time. I was feeling depressed, exhausted, and lost. Nothing super serious, but enough to know that something needed to change. 

And then things did…

First my husband took it upon himself to look up some hotels that would be possible options for a weekend away. He said that we had talked about me possibly going away to have some time to myself before, but we just needed to actually figure it out. He started looking up hotels in Edmonton where we live, but then moved on to hotels in Calgary since I knew that if I was going away I needed to actually “go away.” We found a decent deal at the Wingate by Wyndham Calgary Airport. (And I have to say, it is a beautiful hotel! Definitely would consider coming back again sometime!)

Second, I read the book The Lifechanging Magic of Tidying Up. Some people like the book, others roll their eyes when I mention it. For me, it was what I needed. I started reading it and knew that I needed to follow her plan! I always feel like I am living in chaos and this book helped me gain some control in my life. I started by purging my clothes. Not that I have tons of them in the first place. But I got rid of things that were stained, that I didn’t like, that no longer fit, and that were just worn out! I then moved on to my bathroom and got rid of old lotion, makeup I never used, and a bunch of other stuff. It was SO liberating!!! I continued to purge and organize my entire room, and it has never looked so good! I also bought a full length mirror so I didn’t have to go into my daughter’s room to attempted to see my whole reflection through her sticker covered mirror. I was starting to feel like I was regaining some control. My husband even started following my example and we are slowly organizing the rest of the house.

Third, I read The Happiest Mommy You Know.  It is not a “you have to do this to be happy” kind of book; it was the reflections of lessons learned by the author as she was struggling in her roles as woman, wife, and mother. Her book has provided the inspiration I needed to make some changes in the way I do things.

Fourth, I actually took the trip! The weekend finally arrived and I headed out of town. Edmonton and Calgary are less than three hours driving apart, but it feels like I’ve been on a little holiday! I left right after my shift at work, all the nervous energy starting to make me emotional, but once I was on the highway things were good. I arrived at the hotel, settled in, and realized that I was alone for the first time in a long time! I could do what I wanted, I was on my own schedule! I didn’t have to Worry about what anyone else wanted to do! On Saturday, I met up with a close friend who had been one of my bridesmaids and we spent the day shopping before going out for dinner. I can’t even remember the last time I went shopping on my own for just me! In the evening I picked up a hot chocolate and then sat reading a silly murder mystery. Again, reading novels has been something I haven’t done in way too long!

Today I will be heading home to see my little family. But before I do, I am meeting my grandma for lunch. She is one of the sweetest ladies I know and I’m excited to see be able to spend time with her today. 

And now I need to finish packing and check out of my hotel.

If you are a mother thinking about taking some time for yourself, I would highly recommend it! I’m also starting to try to figure out how my husband and I might be able to get away for a couple nights in the future too!

Until next time!

“Tiana” Dress Up Apron

My daughter turned three on Friday and she requested a “Tiana” birthday party. I figured now would be a good time to make her a dress up outfit to go along with the the occasion!

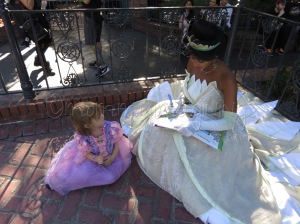
Here’s a picture of E with Tiana during our trip to Disneyland last November. She knelt down on her knees, copying Tiana. It was so cute!


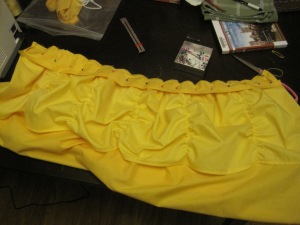
A few tears were shed when E tried on the “Tiana” dress up apron, because it wasn’t poofy, but I think she still likes it since she’s been wearing it all morning!

Want to make one for a special little girl in your life? Here’s how! There are a lot of steps, but I tried to be as thorough as possible so that each step is explained clearly.

THIS PATTERN IS FOR PERSONAL USE ONLY AND NOT FOR SALE. YOU MAY NOT MAKE ITEMS FOR SALE OR PROFIT. IF YOU WOULD LIKE TO SHARE THIS PATTERN, PLEASE GIVE ME CREDIT BY LINKING TO MY PAGE.

Materials:

– light yellow fabric

– green fabric

– ivory tulle (I used tulle on a roll that was 6 in wide since that’s what I had on hand, but I’d recommend the tulle you can buy off the bolt)

– yellow thread

– green thread

– elastic (1 – 1 1/2 inches wide)

– fabric glue

– hook and loop closure

– small piece of felt

– beads or pearls

And here’s how to put it all together! 🙂 

Instructions:

1. The first step is to cut out all the pieces.

Out of the yellow fabric:

Strap: 4 x 22 inches 

Bodice: 8 1/2 x 8 inches (cut 2)

Skirt: 19 x 40 inches (cut 2)

Petals: instructions below – you’ll end up making 9 total

Out of the green fabric:

Waist Band: 3 x 28 inches (cut 2)

Leaves for bodice: instructions below

Leaves for skirt: instructions below

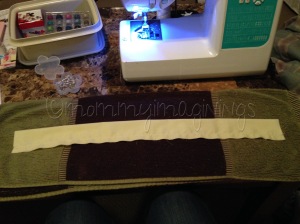
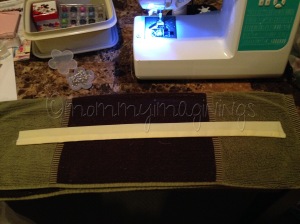
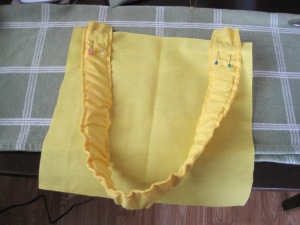
2. Fold the neck strap in half, right sides together, and sew along the long side using a 1/2 in seam allowance. Turn inside out and press. For other aprons I’ve made, I’ve topped stitched along both long sides about 1/4 in from the edge, but I totally forgot this time. I think that it gives a nice airy kind of feel for Tiana’s outfit so I wasn’t too worried.


3. Cut a 14 inch piece of 1 inch width elastic. Insert it into the strap. 


4. Line up the ends of the elastic with the ends of the strap and pin or baste in place. The elastic is shorter than the fabric which will allow it to stretch over your little one’s head.


5. Pin the strap to the right side of the bodice front about 1/2 in from the side edges. After I put it all together I realized that the seam from the strap was on the side closest to her neck which shows a bit more, so if you want to avoid that, make sure the seam is on the “outside” when pinning it in place. Baste in place.


6. Place the back of the bodice on top, sandwiching the strap in the middle. Pin in place then sew around the sides and top using a 1/2 in seam allowance.


7. Turn inside out and press.


8. To make the petals: on a piece of paper, draw a circle with a diameter of about 7 inches, cut out, and then cut in half. Using the pattern you just created, cut the yellow fabric. 

Fold in half and sew along the straight edge using about 1/4 inch seam allowance. 


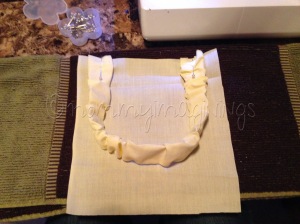
Turn inside out and, positioning the seam so it runs down the back, sew gathering stitches along the round edge. (I have the seam positioned on the side in the phot, but the petals turn out better if the seam is at the back.)


Gather the rounded edge and your petal should look like a petal.


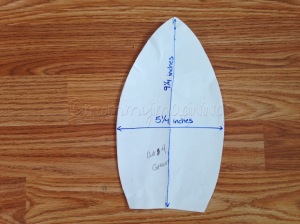
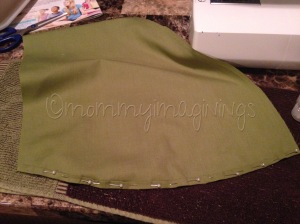
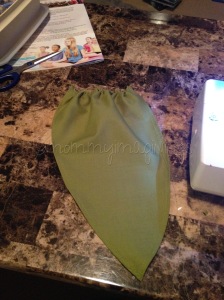
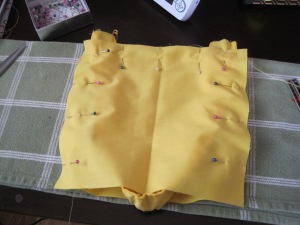
9. To make the bodice leaves: on a piece of paper, draw something that looks like the picture. Once you are satisfied with your pattern, cut four pieces out of the green fabric. Pin and sew two pieces together, using a 1/2 in seam allowance, sewing along the curved edges. Leave the straight edge open so that you can turn it inside out. Turn inside out and press. Repeat with the remaining two green pieces. 


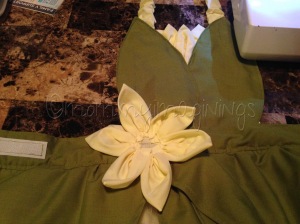
10. Position the bodice leaves on the bodice, pinning just at the top for now. They should slightly overlap. Position three petals behind the green pieces, as shown in the picture, so that when the green is in place no raw edges are seen.


11. Pin the three petals onto the bodice and sew in place. Remove any pins.

12. Pin the green pieces down, adjusting them if necessary so that the raw edges of the petals are hidden. Top stitch about 1/4 in from the edge around the leaves. Start with the leaf on the bottom. I stopped and started again near the straps just so that I could move things out of the way easily and not sew the leaves to the straps. 


13. The stop stitching didn’t attach the leaves to the side of the bodice, so using some fabric glue, I glued down the sides. I put paper inside the leaves first so that the glue wouldn’t seep through to the front.


14. Once the leaves are attached and the glue is dried, trim the bottom of the leaves so they are flush with the bottom of the bodice.

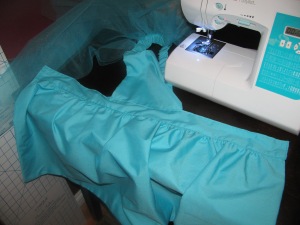
15. Now for the skirt! Pin the two skirt pieces together and sew, using a 1/2 in seam allowance, along the sides and bottom. Trim the corners then turn inside out. Press.


16. I used strips of tulle on this apron, but I recommend using tulle off the bolt. I cut strips a bit longer than the length of the skirt, pinned the on the top, overlapping each strip. Once everything is pinned in place, I trimmed the bottom edges so they were the same length as the skirt. 


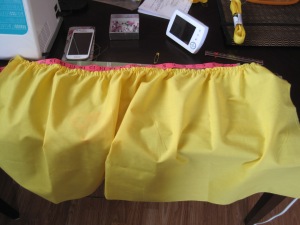
17. Sewing gathering stitches along the top of the skirt and gather to a width of 27 inches.


18. Time to make the leaves for the skirts. First you’ll need to create your patterns. They should look something like these: (When looking at the skirt, D will be on the left side and A, B, and C will be on the right with C as the bottom layer and A as the top).


19. Once you are satisfied with your patterns, cut one of each shape out of the green fabric. Hem the rounded edges by folding under 1/4 of an inch and ironing, then fold under again. Sew the hem.

20. Sew gathering stitches along the top straight edges of each leaf piece and gather. 

21. Position the pieces on top of the skirt and pin in place. Sew along the top edge.

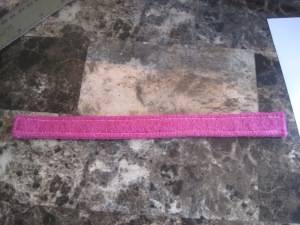
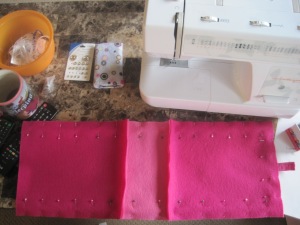
22. Take one waistband piece and fold under all four edges 1/2 inch and press. Repeat with the second waistband piece.


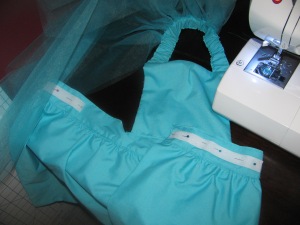
23. Unfold the long edge of one waistband piece and pin along the gathered edge of the skirt front. Sew in place.

  
  24. Unfold the other edge of the same waistband piece and pin the bodice in the center. Sew in place. (If you trimmed the bottom of the bodice earlier it won’t stick out like that. I just trimmed it at this stage.)

25. Turn the apron over so the front of the apron is facing away from you and pin the second waistband piece (edges folded under) so that it is lined up with the first piece, covering all the raw edges. Top stitch along all four sides.


26. Cut a 7 inch length of the hook and loop closure. Pin then sew onto the waistband as shown in the picture.
    
 
27. Almost done! Create 6 more yellow petals as described in step 8. Cut a small circle (about 1 1/2 in diameter) out of felt. Pin and sew on each petal.


28. Sew onto the apron waistband as shown in the picture.


29. Cut a small circle out of green fabric and hand gather the raw edges. Hand sew onto the centre of the flower. Add a few beads or pearls to finish things off!


30. Watch your toddler enjoy her new “dress”!

 
I’d love to hear what you think of this tutorial and how your project turns out!

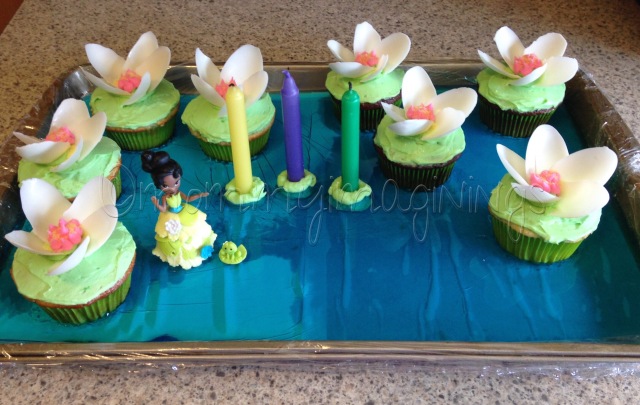
And in case you were wondering…here’s what I did for a cake!

The Gift of Sleep

It has been a long time since my last post…I feel like I’m always saying that (Haha!). But life has been life and balancing life working part time as well as taking care of my two kids has been taking all my time!

This is kind of a random post, but one I’ve been meaning to write for awhile. One of the things that I struggle with as a mom is getting enough sleep. It makes me SO grateful that my kids both sleep soundly through the night. I hear stories of other moms with kids around the same ages as mine telling me how their kids wake two or three times a night still! I would not be able to survive! 

My kids were not born wonderful sleepers. I don’t know if it was them or if it was me, but with a bit of work and structure, we managed to help give them, and us, the gift of good sleep. How did we manage this? Well, it wasn’t by reading the many many books on sleep training that I borrowed from the library. When my daughter was six months old we hired a sleep consultant. Was it pricy? Yes. Was it worth it? Yes!

My daughter had been taking 30 minute naps and waking several times in the night. I was so frustrated and exhausted! I did some research and found Jessica of Upon a Dream Consulting. She was fantastic!!! She was down in Calgary and we were in Edmonton, but it worked out great! The initial consultation was done over Skype and then the rest was done through phone calls and emails. She was so supportive. She answered all my questions and concerns and helped me make sense of all the books I’d read (and believe me, I read a lot of them!) Within about a month, my daughter was sleeping soundly through the night and taking naps that were at least an hour long. I was over the moon! 

And then baby number two arrived! Oh that was brutal! Having to wake every few hours for feeds, dealing with two kids napping, just trying to figure it all out again. In my muddled state I knew I wanted help. So we contacted Jessica and hired her to be our consultant for the second time. She created a new plan for our son and worked with us to get him sleeping well. He was about 8 weeks when we started the training and he didn’t sleep though the night until he was around six months, but he began, and still does, taking nice solid naps and sleeping soundly at night between feeds. Now that he is 20 months he sleeps through the night and takes a 75-80 minute nap in the afternoons.

They both also transitioned well with the time change! Probably since they know how to settle themselves to sleep quickly and easily!

Not every mother or child may need a sleep consultant, but if you are considering one, I would highly recommend Jessica

Wishing you a sound night sleep!

P.S. In case you were wondering, I don’t normally sneak into my kids’ rooms to take photos, but every once in awhile, I need to actually wake them up and I try to catch those precious sleepy faces in a picture.

Our Disneyland Trip! – Part 1

It has been about three months since our trip, but I figure better late than never sharing the details. 🙂

  
It was a three generation girl’s trip: my mom, myself, and my daughter. The idea came about one day, when my little boy was only about two months old, and I was probably suffering from a bit of depression. My husband arrived home from work and since he had the next three days off, I suggested we just go to Disneyland. “Let’s just hop on a plane and just go to Disneyland! Let’s just do it!” Aside from the fact that our little guy didn’t have a passport yet, I thought it was a great idea! And my daughter E was under two so her flight would have been free!

I am so thankful that my husband didn’t outright reject the idea; I think he knew that I couldn’t handle that. However, he was thinking a bit more logically so he suggested that I leave baby C at home with him while E and I went on our own. 

That could maybe work…but then I got thinking about the practicalities of just me and a toddler and realized that I wasn’t quite up for that challenge. I called a friend of mine (who is way more obsessed with Disney than even I am), but for various reasons, she wasn’t able to go. 😦 So I called my mom. Again, for various reasons, it wasn’t going to work for her either, but after thinking more about it, she said that she’d come with me at a later date.

Well, that was all I needed! I started researching hotels and looking up ideas for taking a toddler to Disneyland. (There’s a lot of ideas out there on Pinterest!) I returned to work in the middle of June (a shortened maternity leave since my husband was taking the remaining part of the year as parental leave, one of the best decisions ever, but that’s for another day), and once my vacation time was approved, we started booking! We went during the first week of November.

There were a few booking and scheduling hiccups, but finally the day arrived! We were going to Disneyland!!! I was SO excited to take my little princess to this magical land. And it had been almost twenty years since my mom had been there so I knew she was going to be in for a real treat!

Here’s a list of some of the things that we did that I think helped our trip be a success.

1. Having been to the Disneyland Parks several times, I knew that I wanted to stay as close to the park entrance as possible, as long as it didn’t cost an arm or a leg, of course. The Ramada Maingate at the Park was our choice. It was less than a block away from the park entrance! And very reasonably priced too. Breakfast was provided every morning: hard boiled eggs, toast, cereal, fruit, bagels, milk, juice, coffee, and donuts! We also had a mini fridge in our room which was great for keeping groceries for making our lunches. There was a nice sized pool, complete with splash deck and nice shallow end for E. 

  
The room was nice and clean. Double beds. It was a bit snug, but really, we were at the park almost all the time so it worked for us. I had originally requested a cot for E, but there was NO room for it, so instead I rolled up an extra blanket and stuck it under the sheet on one side of the bed, creating a “railing” to keep E from falling out of the bed while I slept on the other side. It worked great! 

The only downside was that we were on the second floor and there was no public elevator so dealing with a stroller wasn’t the most fun! Especially when E was fast asleep after a busy day in the parks. But we managed ok. E even continued to sleep after being carried upstairs and put straight to bed a couple times.

2. I put a lot of thought into what to bring for entertaining E on the plane. I didn’t bother to bring anything for me…maybe I should have brought at least one book, but it was probably good for me to have no expectations of being able to relax on the plane. Haha! I packed my backpack with diaper bag items (pull-ups, wipes, change pad, extra clothes, etc.) and then threw in a bunch of things to entertain E. I also purchased her a toddler backpack and put some extra things in there for her too. I wrapped a few items in Disney princess wrapping paper too just to change the up a bit.

Here’s what I brought along:

  • Minnie Mouse jewelry: a necklace, bracelet, and rings. These were purchased from the dollar store and wrapped as a present. E loves jewelry right now so she had fun putting dressing up with it.
  • Crayola Mess-Free markers and Minnie Mouse colouring book.
  • Stickers
  • Sofia the First magnet activity book (we even managed to not lose any pieces!)
  • Books from the library. Some people don’t like taking library books on holidays, but I was able to find some great Disney themed books, lots with flaps to open since E loves those books right now, and I didn’t have to pay for them! 
  • Snacks: toddler granola bars, fruit bars, cheesy penguin snacks (similar to Goldfish crackers), pretzels, and mini packages of M&Ms (conveniently stollen from the leftover Halloween candy from a few days before we went on our trip). My mom also brought crackers and cheese sticks. I had purchased some Disney Princess themed snack cups from Tupperware and had the snacks in individual portions to keep things simple. I also brought along a spill proof sippy cup.
  • E’s stuffed teddy. I brought along one of E’s stuffed animals that she was familiar with, but not one that she was super attached to, just in case it got lost.
  • A small blanket for E. A few weeks before we left I picked up some Tinkerbell fabric and made a blanket for the trip. I planned to take it to the parks to keep E warm in the evenings. It was great on the plane for helping her stay warm and cozy. 
  • The iPad and toddler headphones. I have a bunch of toddler games on the iPad, as well as digital copies of movies, and E enjoyed playing the games and watching the movies on the plane rides. 
  • And the extra special treat that I pulled out when the time was right, when E was crazy tired, a small stuffed Figaro kitten that I’d picked up at the Disney Store. E loves kittens and especially Figaro from Mickey Mouse Clubhouse. 

  
3. Although I wasn’t really worried that I’d lose her, I did purchase some custom made Princess themed temporary tattoos which had my phone number on them. I ordered them through Etsy. Each morning I put one of the tattoos on the inside of E’s arm, just in case. I also made sure I had a travel phone plan. Normally when I’ve travelled, I’ve never had a phone plan, but this time was different. I wanted to be able to be contacted in case E was separated from me, and I wanted to be able to call and text my husband back home.

4. The one other thing I did was purchase a Rapunzel dress for E to wear in the parks. I wasn’t sure if I should, if she’d even want to wear it, but I’m SO glad I did! She wore her dress the first and last day we were there and got so many compliments on how cute she looked! I got the dress on sale from the Disney Store. I also took along a Tinkerbell costumed I’d made her for Halloween, but she didn’t end up wearing it.

So there’s a bit of my preparations for our Disneyland trip. In a future post I plan to share more about the actual trip and the things we did to make our trip as magical as it could be.  

Snow White Towel Cover-Up

I will admit that I’m a little obsessed with all things Disney. Especially when it comes to Disney Princesses! I’m super excited to be taking my 2 year old daughter to Disneyland soon, along with my mom who hasn’t been there in almost twenty years! (Yes, I’m leaving baby C with Daddy!)

When I started this blog, I had no idea what I would end up writing about. I had originally thought that it would have been more “mom” stuff, but after discovering how much fun I am having sewing, it has turned out to be more of a crafting and sewing blog. Hopefully anyone who has taken the time to visit my blog has been enjoying the tutorials I’ve shared.

Today I don’t have a tutorial, but I wanted to share something I made using someone else’s pattern. 

My daughter, E, loves Snow White and so I decided to make her a towel cover-up that looked like her dress. I found the pattern for the peasant dress on this blog, and then made a few changes.

  
1. I split the main part of the dress into two pieces to make a bodice and skirt. I constructed the pattern on paper using her instructions and then cut in the appropriate place to make the bodice and skirt pieces. I then sewed them together to make one piece again. I also sewed a piece of ribbon down the front of the bodice.

2. I added red to the sleeves. I cut six tear drop pieces out of red towel and the attached them to the sleeves using a satin stitch.

3. To give the dress a bit more shape, I added some elastic to the inside of the dress where the blue and yellow met.

We haven’t needed to use a towel cover-up since I’ve made the dress, but E loves wearing it around the house! Here she is admiring herself in front of the mirror the first time she tried it on! Don’t mind the messy room. 😉 


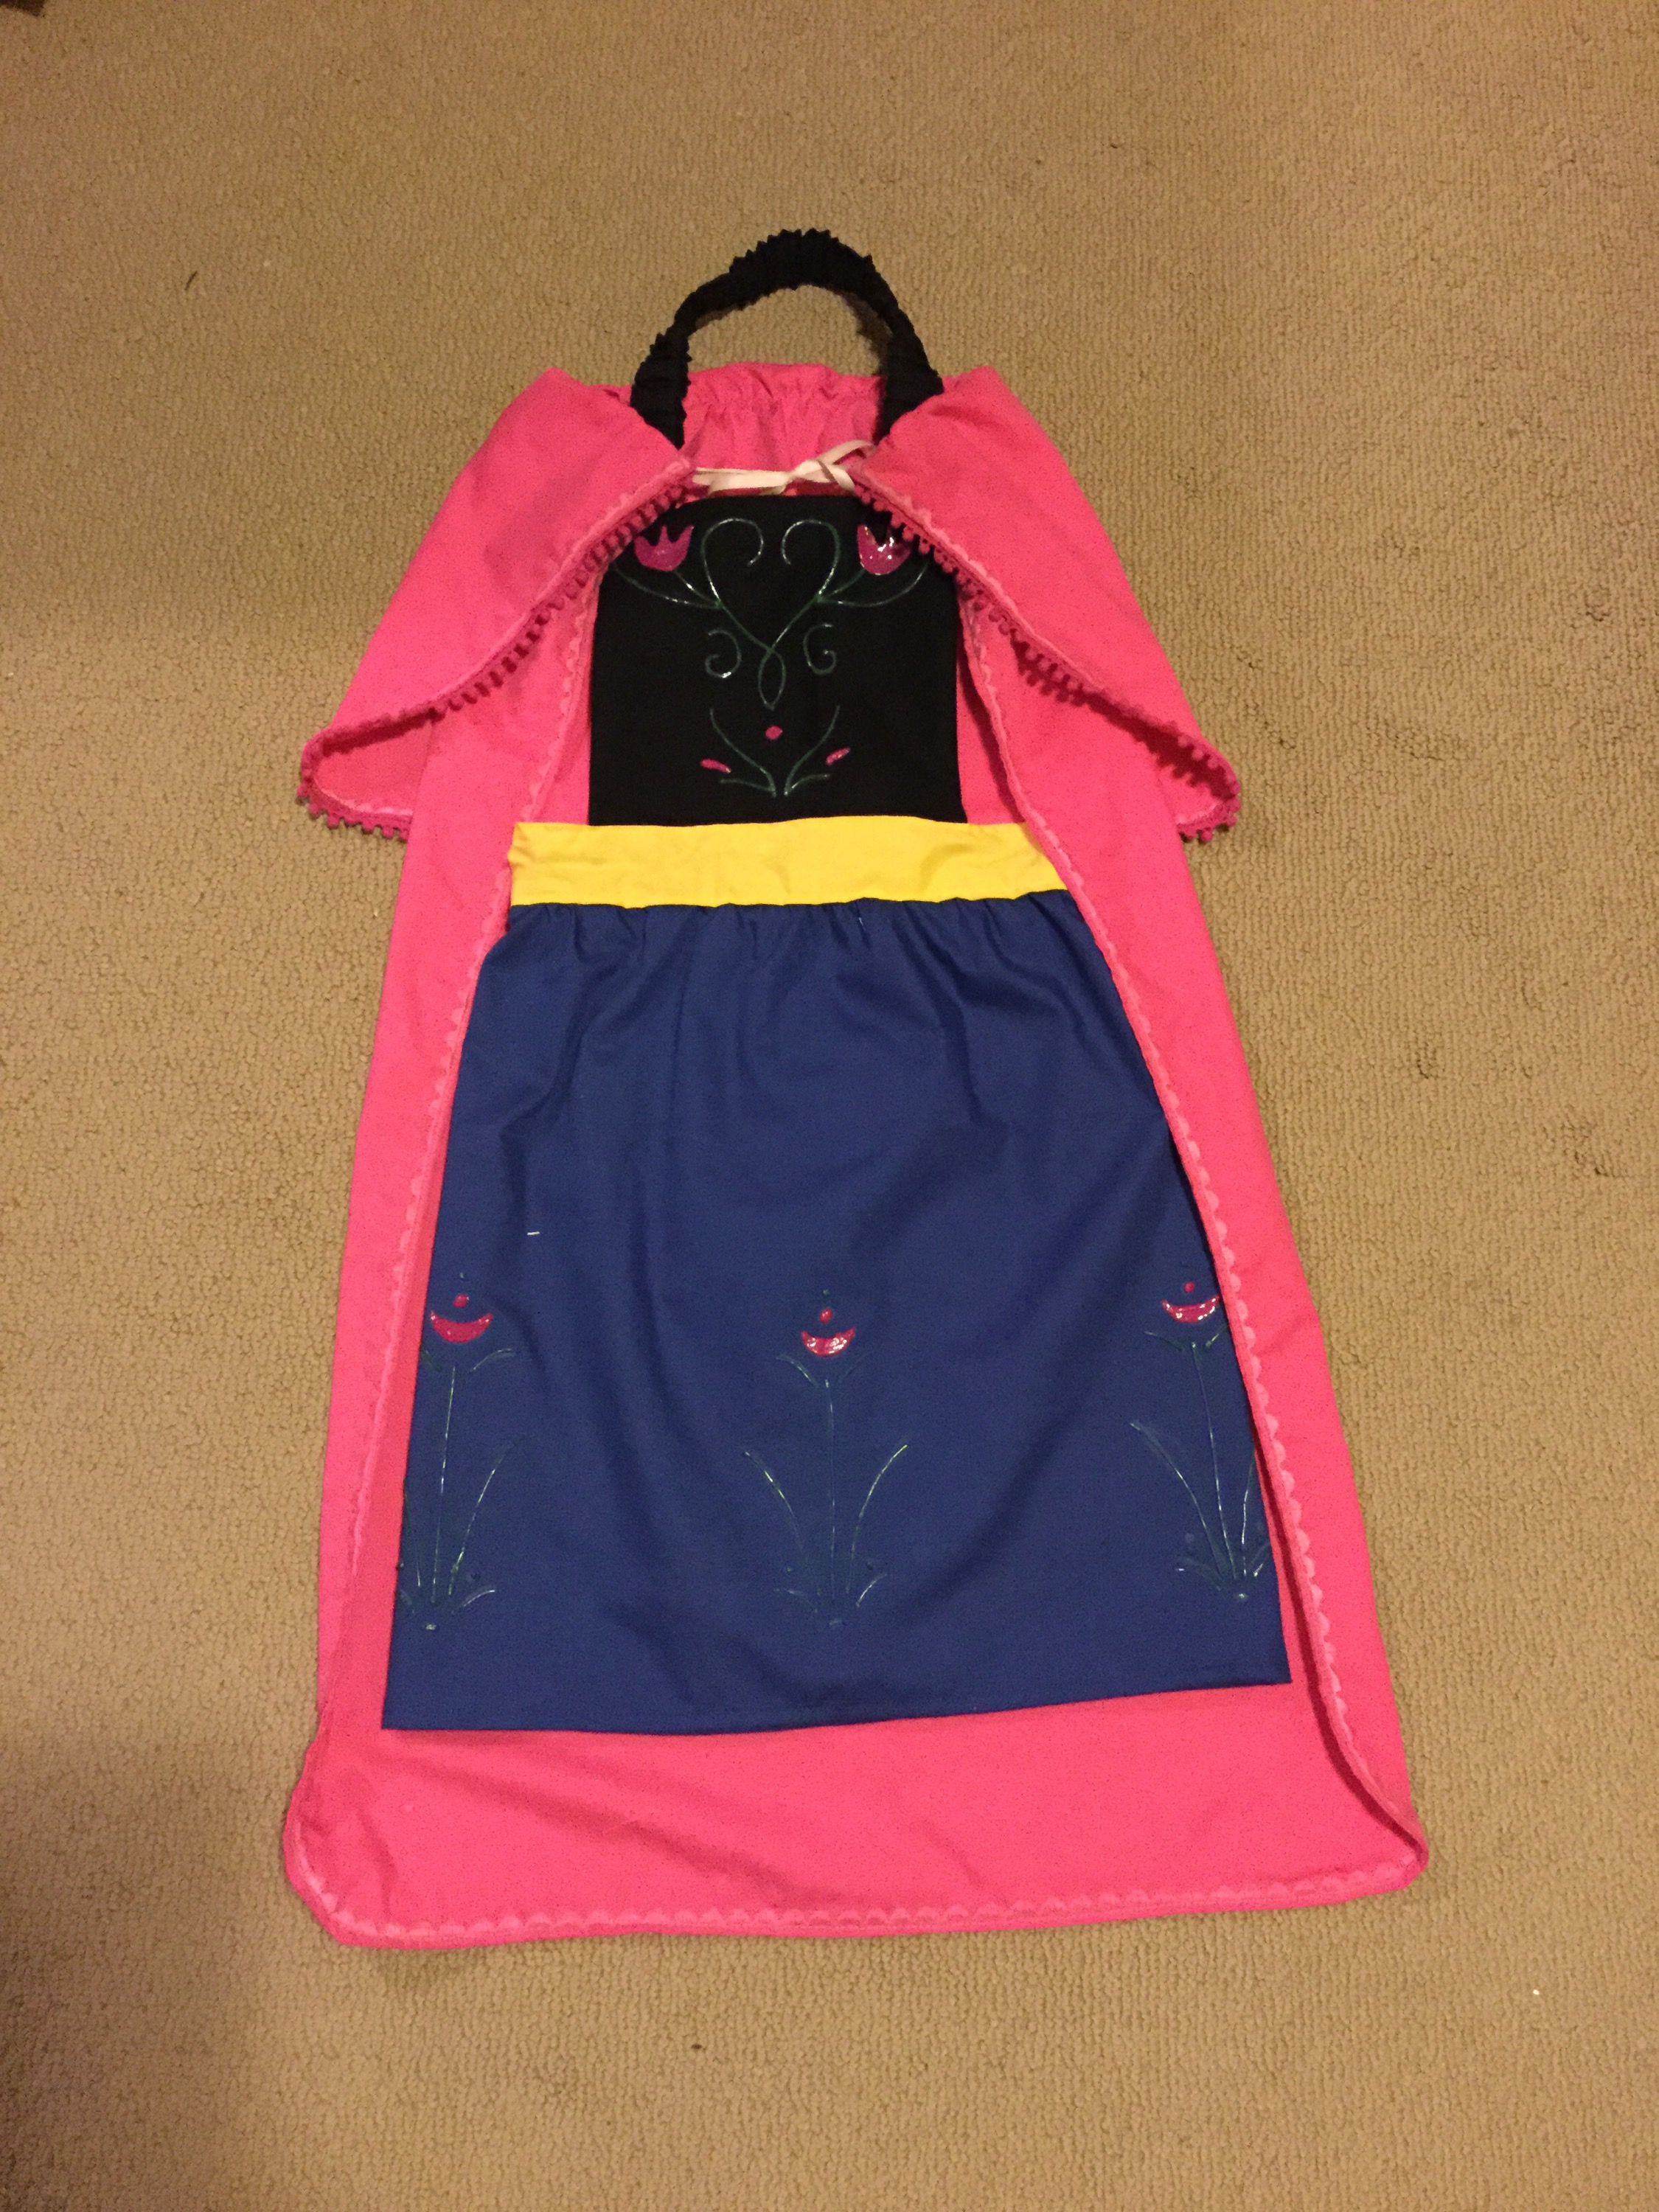
“Anna” Dress-Up Apron and Cape: Now including the tutorials!

The fun thing about having a little girl is that I have an excuse to sew all kinds of fun things! The difficulty with having a toddler is that she can be a bit distructive (although usually not on purpose)! Water and a laptop keyboard just don’t mix. And that is one of the reasons why I haven’t published a post in a very long time! It hasn’t stopped me from sewing and creating though, and here is my latest creation!

My version of an “Anna” dress-up apron complete with matching cape. I’m SO happy with how it turned out! And my daughter looks so cute in it, especially with her chin length hair in tiny pigtail braids!

Materials:

– dark blue fabric

– black fabric

– yellow fabric

– pink fabric

– elastic (1 inch width – for apron; 1/4 inch width – for cape)

– fabric paint (green and pink)

– hook and loop closure

– 1/4 inch wide ribbon – I used light pink, but any colour could be used

– pompom trim

Instructions for the Cape:

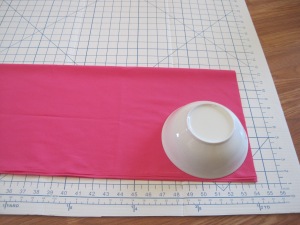
  1. Keeping the fabric doubled as it was on the bolt, cut the pink fabric so that it is about 22 inches by 40 inches. You should end up with two identical pieces.
  2. Fold the pieces in half, and using a bowl, round the corners. You should now have two pieces that look like the picture.IMG_5379IMG_5380
  3. Sew around the pieces, leaving a small section for turning, using a 1/2 inch seam allowance. Turn and press. Top stitch around the entire cape.
  4. Fold over the top part of the cape about 11 or 12 inches and iron to make a crease.IMG_5385
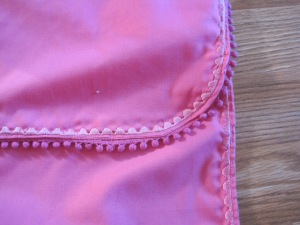
  5. Pin in place, then sew on the pompom trim around the top part of the cape.IMG_5386
  6. This part is optional, but I thought it gave a nice touch. Using a decorative stitch, stitch around the entire cape. You’ll need to do it in two sections – the top part of the cape and the main part of the cape.  If you did it all in one, you’d end up with stitching that was “inside out”.  You want to make sure that the “good” side of the stitching will be facing out when all is said and done.IMG_5389
  7. Pin and sew in place the 1/4 inch wide ribbon along the crease. (It will be under the folded top part of the cape.)IMG_5390
  8. Cut the 1/4 inch wide elastic to 14 inches and sew on top of the ribbon, stretching it as you sew. It will synch up the fabric so that it fits nicely on the shoulders, while also stretching to fit over little heads so Mommy doesn’t always have to be tying a bow!IMG_5392
  9. Fold the top part of the cape over to cover the ribbon and elastic. Tie a knot and bow at the front and you are done!
Instructions for the “Anna” dress-up apron:

  1. The first step is to cut out all the pieces.

Out of the dark blue fabric cut…

  • Skirt: 16 x 38 (cut 2)

Out of the black fabric cut…

  • Strap: 4 x 22 inches
  • Bodice: 8 1/2 x 8 inches (cut 2)

Out of the yellow fabric cut…

  • Waist Band: 3 x 28 inches (cut 2)
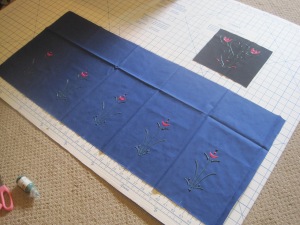
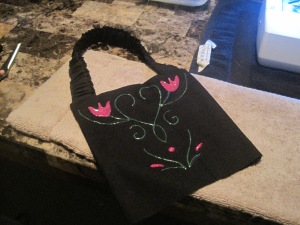
  1. Take one of the black bodice pieces and one of the dark blue skirt pieces and decorate them using the green and pink fabric paints. I just freehanded it based on pictures from a Google image search of Anna’s dress. I did draw on the fabric first with a fabric pencil, but if you are feeling brave, you probably don’t even need to do that step.  Let it dry completely!IMG_5482
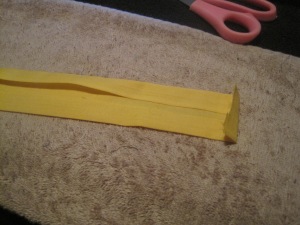
  2. Fold the neck strap in half, right sides together, and sew along the long side using a 1/2 in seam allowance. Turn inside out, press, and top stitch along both long sides about 1/4 in from the edge.IMG_5483
  3. Cut a 15 inch piece of 1 inch width elastic.  Insert it into the strap.IMG_5486
  4. Line up the ends of the elastic with the ends of the strap and pin or baste in place. The elastic is shorter than the fabric which will allow it to stretch over your little one’s head.IMG_5487
  5. Pin the strap to the right side of the bodice front (the one you painted) about 1/2 inch from the side edges. There will be 1/2 inch of the strap going over the top edge. Baste in place.IMG_5491
  6. Place the back of the bodice on top, sandwiching the strap in the middle. Pin in place then sew around the sides and top using a 1/2 inch seam allowance.IMG_5493
  7. Turn inside out and press.IMG_5495
  8. Take one waistband piece and fold under all four edges 1/2 inch and press. Repeat with the second waistband piece.IMG_5503
  9. Take the two layers of the skirt, and right sides together, sew around the sides and bottom. Turn and press. (You might not notice from pictures, but I didn’t end up doing this step.  I that thought that I had bought enough blue fabric, but I didn’t have enough to cut two skirt pieces.  If you are in a similar predicament, simply hem the sides and bottom of your decorated skirt piece.)  Sew gathering stitches along the top of the skirt and gather to a width of 27 inches.IMG_5498
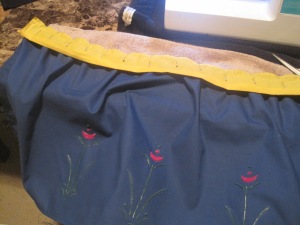
  10. Unfold the long edge of one waistband piece and pin along the gathered edge of the skirt front. Sew in place.IMG_5504
  11. Unfold the other edge of the same waistband piece and pin the bodice in the center. Sew in place.IMG_5507
  12. Turn the apron over so the front of the apron is facing away from you and pin the second waistband piece so that it is lined up with the first piece, covering all the raw edges. Top stitch along all four sides.IMG_5511
  13. Cut a 7 inch length of the “hook” part of the hook and loop closure and a 4 inch length of the “loop” part. Sew onto the waistband as shown in the picture.IMG_5520

And just like that you have completed the “Anna” dress-up apron!  I’d love to hear how it turned out!IMG_5522IMG_5525

THIS PATTERN IS FOR PERSONAL USE ONLY AND NOT FOR SALE.  YOU MAY NOT MAKE ITEMS FOR SALE OR PROFIT.  IF YOU WOULD LIKE TO SHARE THIS PATTERN, PLEASE GIVE ME CREDIT BY LINKING TO MY PAGE.


Thanks for stopping by and as soon as I get my pictures uploaded I’ll write out the instructions for making your own, so check back soon!

“Elsa” Dress-Up Apron

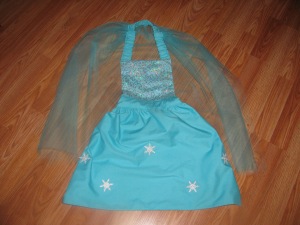
IMG_0130I had such fun making the “Belle” Dress-Up Apron that I just couldn’t stop there!  My daughter has recently started watching Frozen.  I think we have watched it at least once a day for the past week.  She hasn’t learned to sing yet, but I’m sure she’ll be singing the songs once she does!
I’m excited with how the “Elsa” Dress-Up Apron turned out.  Here’s how I made it.


Materials:

– 1 m teal fabric

– 0.2 m sparkly fabric for the bodice (I found some tulle with sequins on it in the bridal section of the fabric store)

– 1 m tulle

– 15 inches of elastic (1 inch)

– snowflake embellishments (optional, but pretty cute)

– hook and loop closure

Instructions:

1. The first step is to cut out all the pieces.

Out of the teal fabric cut…

  • Strap: 4 x 22 inches
  • Bodice: 8 1/2 x 8 inches (cut 2; you’ll only need 1 if you are using an opaque fabric for the front of the bodice)
  • Waist Band: 3 x 27 inches (cut 2)
  • Skirt: 16 x 38 (cut 2)

Out of the sparkly fabric cut…

  • Bodice: 8 1/2 x 8 inches (cut 1)

2. When I bought the tulle it was already doubled (as many fabrics are when on the spools).  Keeping it folded, trim the edges so that they were nice and straight.  Sew gathering stitches along the folded edge of the tulle and gather to about 12 inches.IMG_0101

3. Take the strap piece.  Fold in half and press.  Fold and press each edge up by 1/2 in.  Position the tulle in the middle of the strap so that it is overlapping the folded edge.  Fold the strap in half and pin everything in place.

IMG_0104 IMG_0105

4. Top stitch along both edges about 1/4 in from the edge, securing the tulle in place.  Your strap should now look something like the picture.IMG_0107

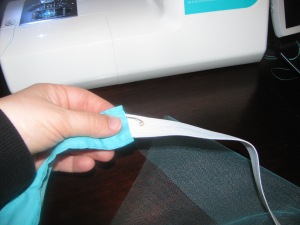
5. Using a safety pin, insert the elastic into the strap.  Line up the ends of the elastic with the ends of the strap and pin or baste in place.  The elastic is shorter than the fabric which will allow it to stretch over your little one’s head.

IMG_0109 IMG_0111

6. If your sparkly fabric is transparent, as mine was, sew it on top of one of the teal bodice pieces.

7. Pin the strap to the right side of the bodice front about 1/2 in from the side edges.  There will be 1/2 inch of the strap going over the top edge.  Baste in place.  Note the position of the tulle!IMG_0112

8. Place the back of the bodice on top, sandwiching the strap in the middle.  Pin in place then sew around the sides and top using a 1/2 in seam allowance.  Your bodice should now look something like the picture.

IMG_0113 IMG_0115

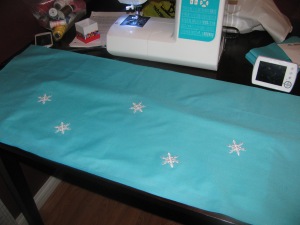
9. Take one of the skirt pieces and attach your snowflake embellishments.  Mine were iron on, but now that I’ve watched my daughter play in her new “dress” I think I’m going to need to sew them on.IMG_0117

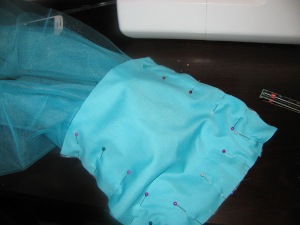
10. Place the second skirt piece over top, sew around the sides and bottom edge using a 1/2 in seam allowance, and turn.  Sew gathering stitches along the top of the skirt and gather to 27 inches.IMG_0119

11. Taking both waistband pieces, fold and press under all the edges 1/2 inch.IMG_0121

12.  Unfold the edge of one waistband piece and pin to the skirt, right sides together as shown in the picture.  Sew in place.IMG_0124

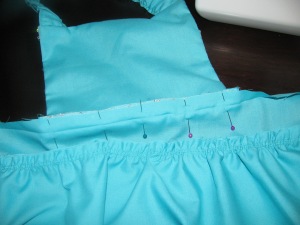
13. Pin the bodice, right sides together, in the centre of the waistband piece and sew in place.IMG_0125

14. Place the second waistband piece, edges folded under, so that it covers all the seams and raw edges.  Top stitch in place 1/4 inch from the edges.IMG_0127

15. Cut the hook and loop closures and sew on to the waistband.  I sewed the “hook” part so that it would be on the top of the skirt when wrapped around my daughter’s waist, that way it would be less likely to catch on the tulle.IMG_0128

16. Admire your completed project and watch your little one enjoy her new “dress”!IMG_0130

“Belle” Dress Up Apron

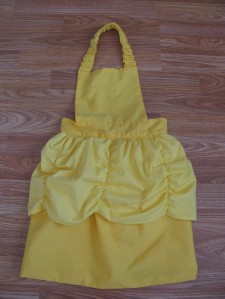
IMG_0066Part of our morning routine involves putting on a movie for my daughter to watch.  E has been enjoying watching lots of Disney movies and one of her current favourites is “Beauty and the Beast”.  She also loves to dress up so I figured it was time to try my hand at making a “Belle” dress-up apron like I’d seen on Pinterest.

After looking at several patterns and pictures, I decided how I was going to proceed.  I got most of my measurements and inspiration from this site, but then made some modifications which I’ll share in this post.  One of the things I modified was the neck strap.  With a newborn at home now, I wanted to make sure that my daughter would be able to put on and take of the “dress” with as little help from me as possible.  The neck strap stretches over her head instead of having it tie in the back.  I ended up having to go back and shorten the elastic to make the neck strap a better size, so the pictures show a longer neck strap than you’ll get if you follow the instructions.

Materials:

– dark yellow fabric

– light yellow fabric

– elastic (in two widths – 1 inch and 1/4 inch)

– hook and loop closure

Instructions:

1. The first step is to cut out all the pieces.

Out of the dark yellow fabric cut…

  • Strap: 4 x 22 inches
  • Bodice: 8 1/2 x 8 inches (cut 2)
  • Waist Band: 3 x 28 inches (cut 2)
  • Skirt: 16 x 38 (cut 2)

Out of the light yellow fabric cut…

  • Skirt Overlay: 12 x 42 inches

IMG_52352. Fold the neck strap in half, right sides together, and sew along the long side using a 1/2 in seam allowance.  Turn inside out, press, and top stitch along both long sides about 1/4 in from the edge.


IMG_5237

3. Cut a 15 inch piece of 1 inch width elastic.  Insert it into the strap.


IMG_52404. Line up the ends of the elastic with the ends of the strap and pin or baste in place.  The elastic is shorter than the fabric which will allow it to stretch over your little one’s head.


IMG_52415. Pin the strap to the right side of the bodice front about 1/2 in from the side edges.  There will be 1/2 inch of the strap going over the top edge.  Baste in place.


IMG_52426. Place the back of the bodice on top, sandwiching the strap in the middle.  Pin in place then sew around the sides and top using a 1/2 in seam allowance.


IMG_52437. Turn inside out and press.

8. Take one waistband piece and fold under all four edges 1/2 inch and press.  Repeat with the second waistband piece.


IMG_52459. Sew gathering stitches along the top edge of each dark yellow skirt piece and gather to 27 inches.  Set aside.

10. Take the skirt overlay piece and hem the bottom: press the bottom edge 1/4 in under, then fold over again, press, and sew the hem.


IMG_524611. Mark on the wrong side of the skirt overlay, every 7 inches along the bottom as well as at the top, approximately 1 inch from the top edge.  Cut five lengths of the 1/4 inch elastic to 7 1/2 inches.  Pin the elastic at the marks you just made.  (The hemmed bottom of the skirt is at the top of the picture.)


IMG_524812. Sew along the elastic, stretching it so it lays flat against the fabric.  Once sewn, because the elastic is shorter it will create the gathers.


IMG_525013. Sew gathering stitches along the top edge of the skirt overlay and gather to 27 inches.


IMG_525114. Place the overlay on top of the skirt front.  Baste along the sides and gathered edge.


IMG_525215. Place the back of the skirt over the front piece, right sides together, and sew along the bottom and sides.  Turn inside out and baste gathered edges together.


IMG_525316. Unfold the long edge of one waistband piece and pin along the gathered edge of the skirt front.  Sew in place.


IMG_525417. Unfold the other edge of the same waistband piece and pin the bodice in the center.  Sew in place.

18. Turn the apron over so the front of the apron is facing away from you and pin the second waistband piece so that it is lined up with the first piece, covering all the raw edges.  Top stitch along all four sides.


IMG_525619. Cut a 7 inch length of the “hook” part of the hook and loop closure and a 4 inch length of the “loop” part.  Sew onto the waistband as shown in the picture.


IMG_525820. Watch your toddler enjoy her new “dress”!


Now to wait for another sale at the fabric store so I can make Cinderella and Sleeping Beauty aprons…and maybe some other princesses too! 🙂


THIS PATTERN IS FOR PERSONAL USE ONLY AND NOT FOR SALE.  YOU MAY NOT MAKE ITEMS FOR SALE OR PROFIT.  IF YOU WOULD LIKE TO SHARE THIS PATTERN, PLEASE GIVE ME CREDIT BY LINKING TO MY PAGE.

Quiet Book Cover

Now that the tutorials for the pages in the Disney Princess Inspired Quiet Book have been posted, it is time for the finishing touches – sewing the pages together and creating the cover.

First, sewing the pages together.  When I created the quiet book, I completed all the pages and then sewed them together.  That means that each of the pages had about 1/2 inch on three sides that “disappeared” when sewn to the next page.  The fourth side is used for binding the book together.

I only have a few pictures of putting the pages together, so hopefully my instructions will be clear enough.  If not, comment below and I’ll try to clear things up!  🙂

IMG_40411. For the first (and last – which is what I’m showing in the pictures) page in the book, take a plain piece of felt, cut to 10 x 8 1/2 inches.  Place it over the “right” side of the quiet book page (the side with all the details).  Pin on the three outer edges.

IMG_4042If you were to flip it over, you’ll see the back of the quiet book page.

Sew around the three edges, using a 1/2 in seam allowance.  Trim the sewn corners and turn inside out.

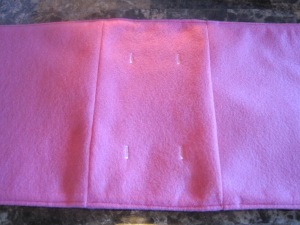
IMG_40452. Fold the open edges under about 1/2 in and top stitch around all four edges.

IMG_40463. Sew a straight line about 1 1/2 in from the side that doesn’t contain the page details.

4. Create small button holes 2 inches from the top and bottom.


And now for the cover…

Materials:

– five pieces of felt (I used two pieces of sparkly felt and three pieces of plain pink felt)

– snap

– ribbon

IMG_40501. Cut both pieces of sparkly felt so that they are 10 1/2 x 9 inches.  Cut one of the plain pink felt pieces to 4 1/2 x 9 inches.  Pin and sew this to the sparkly felt as shown in the picture.  Cut another piece of plain pink felt to 4 1/2 x 9 inches and sew to the other two full pieces of pink felt.


IMG_40582. Cut some sparkly felt to 9 x 2 inches and fold in half.  Fold over the edges of one side as shown in the picture.  Sew along the edge.  Turn inside out.

IMG_4061Top stitch around the edges.


IMG_40633. Place the inside of the cover so the “right” side is facing you.  Pin the strap in place.  You can see it sticking out in the picture.  Place the outside of the cover on top so the “wrong” side is facing you.  The “right” sides will be together.

IMG_4064Sew along the top, bottom, and side with the strap.  Trim the corners and turn inside out.


4. Fold the open edges under 1/2 in and top stitch around the entire cover about 1/4 in from the edge.

IMG_40735. Create four button holes from the top and bottom edges so that they are the same distance from each other as the quiet book pages.


IMG_40766. Cut a piece of ribbon and thread it through the cover and page button holes.  Tie the ribbon with a double knot and then a bow.


IMG_42427. Attach the snap to the cover and strap.

Enjoy your completed book!

THESE PATTERNS ARE FOR PERSONAL USE ONLY AND NOT FOR SALE.  YOU MAY NOT MAKE ITEMS FOR SALE OR PROFIT.  IF YOU WOULD LIKE TO SHARE THESE QUIET BOOK PAGES, PLEASE GIVE ME CREDIT BY LINKING TO MY PAGE.

Disney Princess Inspired Quiet Book: Sleeping Beauty Pages

Thank you so much for your patience waiting for the rest of the tutorials for my Disney Princess Inspired Quiet Book.  Today I’m going to share how to complete the Sleeping Beauty Search and Find Pages.

IMG_4084

Don’t forget to check out my completed Disney Princess Inspired Quiet Book!

NOTE: When I created the quiet book, I completed all the pages and then sewed them together.  That means that each of the pages has about 1/2 inch on three sides that will “disappear” when sewn to the next page.  The fourth side will be used for binding the book together.  You can see the finished book here.  The instructions for the binding will be in a future post.

THESE PATTERNS ARE FOR PERSONAL USE ONLY AND NOT FOR SALE.  YOU MAY NOT MAKE ITEMS FOR SALE OR PROFIT.  IF YOU WOULD LIKE TO SHARE THESE QUIET BOOK PAGES, PLEASE GIVE ME CREDIT BY LINKING TO MY PAGE.

Materials:

– felt (light blue, dark blue, green, dark brown, light brown, beige, gold, red)

– fabric paint (brown, green)

– glue

– Shrinky Dink Plastic

– Search and Find Pattern

Instructions:

1. Trim both background light blue felt so it is 10 inches by 8 1/2 inches (this will be the standard size for all the pages in this quiet book).

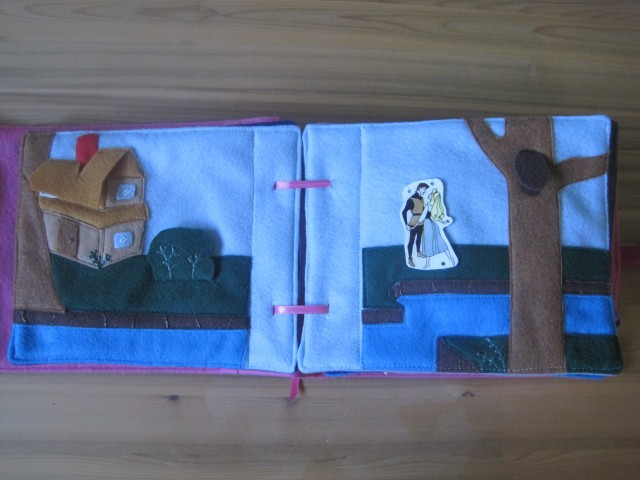
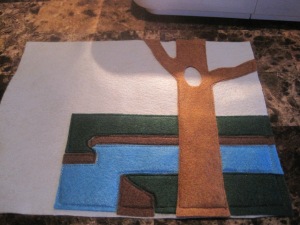
IMG_37952. First the right hand page.  Cut out the various pieces for the landscape and sew in place as shown.  I started at the bottom and worked my way up.  It meant switching thread in the sewing machine each time, but it also meant that everything would fit together.


IMG_37993. Cut the hole out of the tree and sew the tree in place.  From the dark brown felt, cut two dark brown ovals the same size as the hole in the tree.  Glue one in the hole (only glue around the edges otherwise sewing on the owl is a lot more work) and the second one, sew along the top to make a flap.


IMG_38564. The left hand page is a bit more time consuming.  Cut out the pieces and sew in place as shown in the picture.  Sew the bush only along the bottom edge to create a flap that opens downwards.  Sew the roof along the top to create the flap.


IMG_38605. I found pictures using a Google search for the couple dancing, the owl, and the fairies.  It took a bit of trial and error to get things to the size I wanted, so be patient with this step.  I traced the images onto the Shrinky Dink plastic and then coloured with permanent markers.  Once they were shrunk, I put a layer of clear nail polish over top to keep the colour from being worn off.  Don’t forget to make holes in your shapes before you shrink them so that you can sew them onto the page!  Sew in place.

IMG_38626. Using the fabric paint, paint on the details as shown in the pictures.  Let dry and the pages are complete!